Author: Russell Klimas

  • The Controversy of AI Art (A Well Rounded View)

    “AI Art” (at the current time of this writing) has gone viral on the web and there is a lot of controversy regarding the ethics surrounding it, how data is acquired, and what it could mean for the future. I’ll do my best to explain both sides. If you would like to have a civil discussion on the topic please comment below and how to solve problems if we need to, after consuming this content. At the end of the day there isn’t really anything we can do to stop AI, other than writing to the people who house them asking for changes, not using their product, and bringing awareness to all aspects as a whole. Eventually maybe laws will get put into place. All of this is SO new and is changing constantly.

    1. Claim: AI Generators are stealing art

    First let’s look at the accusation that artists are accusing the LAION database/Stable Diffusion of doing so we can look at the problem as a whole. From my understanding artists are claiming that because AI Generators can mimic the style of their art (because the AI was potentially given copyrighted material without their consent) that they’re stealing it. Keep in mind that some AI Generators could have used open source or royalty free stock images.

    In a nutshell, AI generators create products, such as images, based on the material they are trained with. They do this by identifying the similarities (which might or might not make sense to humans) this can include the image itself, the tags associated with the image, and other related information. As an example, if an AI has been trained to differentiate between cats and dogs, it may be able to accurately identify a cat or a dog in an image. However, if the AI is shown a picture of a duck, it may not be able to recognize the specific type of animal, and may instead classify it as a cat or a dog based on the similarities it has identified. In other words, the AI may not be able to say “duck” when shown a picture of a duck, but it may be able to correctly identify it as either a cat or a dog. However, if the AI is trained exclusively on Van Gogh’s work, it will produce Van Gogh-like images. But if the AI is trained on a variety of styles, the resulting images may be completely random.

    I’m going to describe how diffusion models like Dalle2, Stable Diffusion, and Google’s Imagen work. Images begin as they are and over a certain number of steps gaussian noise is added to the images. This takes it from looking like a coherent image to something that resembles the static on your TV. When it adds this noise gradually it leaves a path for it to follow back to reverse the addition of noise that it began with. So obviously that just leaves you with the same image right? How do we get new images?

    Enter the noise predictor or model. I’m going to describe how it works on one image and then imagine that applied to billions. First we take all the image, generate some random noise, we pick an amount of noise that we want (say 0 is no noise and 10 is all the noise), and then add noise to the image in that amount. We then repeat this process multiple times choosing different noise amounts on all images. Imagine this is varying snapshots of your memory where 0 is the memory that just happened and 10 is it happened many years ago and you can’t recall any details. Now let’s take this and multiply it. First we have all the images in the database and we start the denoise process, the AI will then refer to the text prompt (which we get into below) and looks at the average of each pixel if an image that has those “alt tags.” Overtime in each step it realizes what is or what isn’t the text prompt to eventually making an image. All images start the same as random noise but over each step choose a different path to become a new image. Here is an simplified infographic from reddit user PhyrexianSpaghetti that explains the process.

    So how does the text come into play? In the Stable Diffusion we use OpenCLIP and CLIP is trained on a dataset of images and their captions. Most likely CLIP is trained off of images crawled from the web and their “alt” tags.

    CLIP is a combo of an image and text encoder. In this process we are assigning words to images and embedding those words and images together. Until they are embedded they won’t relate to each other, and this process may take multiple iterations.  Eventually we will have embeddings that can take the image of a dog and tie it to the words “a picture of a dog.” The process also includes negative examples of images and captions to make sure they aren’t similar.

    Now that text has been included on those images we simply add it as an additional factor in the image creation process that was described above and allows us as humans to interact and tell the generator what to do.

    Now the issue becomes that if the data the generator was trained on has less random material then its guesses will be less random, this is called overfitting. Overfitting can happen when the AI/ML is trained with materials that are too similar to each other, allowing too many degrees of freedom or parameters inside the model, and/or allowing the model to be trained with too many steps or iterations, and the images that result from that will be less random or not wide enough. With this being the case it’s possible that the image generated will be close to the material it was trained on instead of being random. Our goal here is not to generate images that are the same, we are going for the style. To read more about this and have visuals go here.

    The reason this isn’t illegal persay is because a “style” can’t be copyrighted. On top of that copyright only applies to humans and not AI. Now does that apply to humans who program the AI? I don’t know. In time this might change via extension but for now it’s completely legal.

    In Dave Grossman Designs v. Bortin
    , the court said that:

    “The law of copyright is clear that only specific expressions of an idea may be copyrighted, that other parties may copy that idea, but that other parties may not copy that specific expression of the idea or portions thereof. For example, Picasso may be entitled to a copyright on his portrait of three women painted in his Cubist motif. Any artist, however, may paint a picture of any subject in the Cubist motif, including a portrait of three women, and not violate Picasso’s copyright so long as the second artist does not substantially copy Picasso’s specific expression of his idea.”

    The part missing from this quote is that it doesn’t mention the intent or action to distribute and or monetarily gain. Simply copying something doesn’t infringe on copyright, it’s what you do with it afterwards. Again this only applies to humans and not AI but I think it’s important that we have some context on what has been set in court previously, and we will be referring to later.

    Now does that make it right? Just because something is legal doesn’t make it OK. Humans can do everything that machines can do (in essence). Machines can just do it faster. I could do the exact same thing the machine does looking at thousands of images in a style and copying it, it would just take me a lot longer, if that is what we trained the machine to do. Now copying someone’s work isn’t going to set me apart from the crowd by any means and people still talk. Does this apply to AI? With enough time it’s easy to tell what is made with AI, and with Stable Diffusion 2.0 they have invisible watermarks that will help distinguish what is human and machine.

    When it comes to image transformation or deviations the legal system is still pretty weird on the matter. When we look at Andy Warhol and the work he created in the majority of cases he didn’t commit copyright infringement. The biggest difference between this and using copyrighted art for AI is that it could impact artists in a negative way, if the copyrighted material wasn’t given with consent.

    – What is stealing?

    On the point of stealing art. I would argue that the majority of people have illegally downloaded or streamed music, movies, tv shows, video games, etc.. Would this not be considered stealing art? If this person had illegally downloaded or streamed art, and has an issue with AI “stealing” art would that not be hypocritical? It doesn’t matter if they are making a profit or not. Stealing is still stealing. I just want to make sure we have a level playing field and we aren’t lording ourselves as “better.”

    On the same notion, what about the artists at Comic-con who draw characters that are not their Intellectual property and they still make a profit off of it? Or fan artists/cosplayers who have a Patreon and charge for images of the fan art or cosplay? This could also apply to Instagram Reels and making money off of that with their fan art/cosplay content. In my opinion, from what I can tell, that is no different and is illegal. Using something that isn’t yours to make profit/art. This same argument can be applied with the style of caricature and how someone created that a long time ago and we don’t consider that stealing.

    Now I’ve had people argue that if the IP holder says it’s OK then it’s OK to break copyright infringement. Unless there is a blanket statement out there from the IP saying it’s OK then you should ask permission correct? I believe (and could be wrong) that most people in this field ask for forgiveness rather than permission. With that the IP holder has the ability to withdraw that ability to break copyright at any time. And even then this only applies to a certain point until the person breaking copyright makes too much money or gets too big. Regardless, it’s still breaking the law which is illegal. I’m not saying I’m any better as I’ve enabled and benefited from this behavior, but it’s important I’m fair to parties on all sides.

    In most recent news there is the case of an artist using someone’s photograph and making an artistic version of it and making a profit, that in my opinion is 95% identical minus a few details. With how I was brought up to understand plagiarism this is a blatant example of it. However the judge ruling the case said that the photograph itself, or rather the pose, wasn’t unique enough to warrant a copyright. So the artist, who the photographer accused of plagiarizing, won.

    At first glance it’s pretty easy to say “they obviously plagiarized” but consider this. If the photographer and the artist are in the same place at the same time and the photographer and artist had the same POV, and the images they created are 95% the same is it still plagiarism? All of this to say the artist didn’t take the photograph itself and transform it, but instead used it as a source material. The artist began with a blank canvas and with their artistic vision used different tools to create something. Whether you agree with this or not is up to you. I know I personally feel icky about it but I’m not an expert in law either.

    The photographer in question is going to try and appeal the decision but this is our most current information. For the case of artists claiming AI Art is stealing their work this does not bode well for that argument at least in copyright law. See it for yourself here. It’s important to note that regardless of the tool used whether a person uses a AI generator or pen and paper to reproduce something that could be a plagiarized work it’s not the tool that is at fault but the individual.

    If one person steals does that make it OK for other people to steal? Of course not, but it seems that when it starts to affect people personally that it becomes an issue. We see this time and time again throughout history.

    So the question I have to ask is why is it that we’ve decided it’s OK to steal art in some ways but not other ways?

    References on how selling fanart or cosplay can be considered infringing on copyright.

    Reference 1

    Reference 2

    Reference 3

    2. The Dance Diffusion Problem

    I was first made aware of the issue thanks to Steven Zapata and a Youtube video he uploaded. The title of this section is direct from his.

    The Dance Diffusion Problem is what brought me from being pro Stable Diffusion to being against its current practices. With how I believed I understood how Stable Diffusion worked I thought the models were fine but you’ll see why I feel different now. Here is a quote from Hamonai, which operates in Stability AI.

    “Dance Diffusion is built on datasets composed entirely of copyright-free and voluntarily provided music and audio samples. Because diffusion models are prone to memorization and overfitting, releasing a model trained on copyrighted data could potentially result in legal issues. In honoring the intellectual property of artists while also complying to the best of their ability with the often strict copyright standards of the music industry, keeping any kind of copyrighted material out of training data was a must.”

    So it sounds like they’re afraid of copyright in music because it’s more restrictive than art. When the dataset for Stable Diffusion was first made they may have had the oversight of using copyrighted materials when they shouldn’t have and are avoiding making that same mistake with music. It’s an easy jump to say it’s a double standard in this instance (and it very well could be) is it for certain? I don’t know.

    Now while using Stable Diffusion and making a profit wasn’t the original intention of the platform, Lensa allegedly took advantage of it, and instead of training their own model on non copyrighted material decided to go with what was already there. Do we know this for sure? Nope. Generally those who create with no intention to profit or cause harm are not considered bad and Stability AI didn’t create Stable Diffusion with the intention that Lensa allegedly took advantage of. This brings us back to Comic-con artists selling work of copyrighted characters because it’s similar (not the same) to the actions that Lensa allegedly took.

    3. Claim: AI Generators are going to put people out of a job

    Yes, maybe. With every new technology jobs are going to change. This same argument was made when photography came about. Painters were up in arms because now their job could be done in the click of a button. To experience these arguments yourself and see the similarities check out the references below. Or when the ATM was introduced in the 1970s people thought that would lead to unemployment to bank tellers, in fact it did the opposite and increased the amount of jobs. Albeit in our day and age it can happen much quicker but the principle is the same.

    That doesn’t mean we have to like it and there will always be work for things crafted from human hands. People still want legitimate paintings of themselves. AI (as of the time of this writing) can’t compete with the majority of what photography can do. It can do individual portraits at best (and that’s only close up), anything else requires a lot more work of the human hand, and it has no consistency. If you want your subject to be holding any kind of instrument, in most cases AI can’t make heads or tails of it. And a full body image or fingers? Forget having a coherent face or the right amount of fingers.

    What I am going to explain next is adapted from Frank C. who has worked in the video game development world since 1996. I found his comments in a thread on Lensa and thought they provided a unique outlook I hadn’t seen yet. I have shortened the name for privacy sake. Also keep in mind this is just one example and is not applicable to everything.

    Any tools that deal with automation have never made the milestones that go with video game development complete any faster. Once those that produce the game see the work happen in less time they just add more work on top, so that it makes the time automation saved, moot.

    Most game and movie studios struggle to create content at the same rate that customers consume it.

    He thinks that concept artists, in the realm of video games at the very least, will be fine. Sure AI images can be created quickly, yet let’s ponder this likely scenario. You generate a helmet using AI, awesome that’s great. Do you just submit it and be done? Not at all.

    The client may ask questions such as: Can we see this helmet in 15 different material styles or see how the helmet animates and the straps function? What about a bunch of different skins for DLC? Oh we will need a model of said helmet can you create that and send it to our 3D animators? We will also require HUD elements, and themes that feel unique for guilds within the game, and the need for renders for UI to make icons of the helmet. How will it look on our website? Make sure you check with Quality Assurance that it reads well on desktop and mobile.

    This example shows how “image generation” is just a very small part of a much bigger job.

    There are loads of other skills that are needed as a concept designer that deal with communication with humans, design with graphics, mechanics, ergonomics, world building, etc. Those are all still skills that are needed, just being able to prompt well won’t get you a job if you don’t have those.

    Another great example that is in a similar vein was when Jurassic Park was created. Originally the entire movie was going to be done with stop motion and practical effects for the dinosaurs. CG was still very much an infant at that time and some of the CG artists decided they were going to try and see if it would be possible to create the motion of dinosaurs with CG, after hours on their own time. They ended up making a set of T. Rex bones that moved and walked. Producers came up to see something else and saw it playing on a monitor and from then everything changed.

    It’s important to note that in the film practical effects were still used just not to the extent that they were originally planned. With every advance in technology jobs are going to change and CG shook the cinema world to its core. Watch part of a documentary on The Jurassic Park process here.

    References on painters reaction to photography

    Reference 1

    UKEssays. (November 2018). Reception of photography. Retrieved from https://www.ukessays.com/essays/photography/reception-of-photography.php?vref=1

    Reference 3

    4. Claim: AI Art isn’t art

    This one doesn’t make sense to me because art is subjective. Always is always will be. When photography was invented it wasn’t considered art until 100+ years later. Does that mean it was art at one point and not art at another point? I don’t believe that is how it works.

    There are multiple websites that are outright banning AI Art which is completely in their right to do, it is their platform. How they can tell that exactly I don’t know other than “look at it.” In their own way they are defining art, whether that is good or bad is up to you, the individual. Art being subjective is what makes it beautiful as it allows a child’s drawing for their parent to be art to them, but isn’t art for anyone else.

    In light of that if we as humans aren’t constantly challenging “What is art?” Are we attempting to explore any further? A good example of this is of Duchamp when he submitted a urinal, upside-down, with the words “R. Mutt, 1917” written on it and titled “Fountain.”

    This quote which is believed to have been from Beatrice Atwood though from an anonymous editorial said this:

    “Whether Mr Mutt with his own hands made the fountain or not has no importance. He CHOSE it. He took an ordinary article of life, placed it so that its useful significance disappeared under the new title and point of view—created a new thought for that object.”

    Another example is “Untitled” (Portrait of Ross in L.A.) by Felix Gonzalez-Torres. When you look at this piece you simply see a bunch of candy, in a pile, in the corner of a room. What are your first thoughts? Probably “that isn’t art” right? Now what if we add context.

    The weight of the candy is 175 pounds, which is the ideal weight of the piece whether that was the weight of the average man of the time or that of Ross in the portrait. Ross Laycock, the person in this portrait and artists’ partner, died of AIDS complications in 1991. As visitors participate in the art piece by taking candy the configuration of the piece changes, emulating the act of loss. See it for yourself here.

    I find that if we apply this to AI Art it’s no different. After all, if a urinal with writing on it can be art, I’m pretty sure that whatever AI can make should be art too. That’s just my opinion though.

    5. Claim: The LAION Database has pictures of people from medical records, violent images, and non-consensual sex.

    This is partially accurate from what I can find as of writing this. Because they use URL scraping (which in the USA is completely legal) images can be found and cataloged from all over the web, they don’t store them anywhere. If you use the website Have I Been Trained, people have found medical record pictures of themselves that were illegally obtained after their doctor died and uploaded to the web. Obviously this isn’t ok (and apparently there is no previous legal writing stating that it’s wrong, it just needs to be made) but shouldn’t have been uploaded to the web to begin with.

    According to this article from VICE (I don’t know where they got their information from whether it was a direct interview or not) Stable Diffusion which uses the LAION database stated:

    “Stable Diffusion does not regurgitate images but instead crafts wholly new images of its own just like a person learns to paint their own images after studying for many years,” a Stability AI spokesperson told Motherboard. “The Stable Diffusion model, created by the University of Heidelberg, was not trained on the entire LAION dataset. It was created from a subset of images from the LAION database that were pre-classified by our systems to filter out extreme content from training. In addition to removing extreme content from the training set, the team trained the model on a synthetic dataset to further reduce potential harms.”

    When presented with specific images of ISIS executions and non-consensual pornography, Stability AI said it could not say whether Stable Diffusion was trained on them, and distanced itself from the LAION dataset.

    With Stable Diffusion moving away from that dataset I think this solves the issue. Google’s Imagen, which is still private, has put measures in place to avoid this data as well.

    The real issue with these large datasets is creating a dataset that is appropriate vs obtaining one. Do you start totally fresh with an empty folder and input images one at a time (to make sure copyright isn’t infringed) or find a folder that has millions of images and check them one at a time to make sure they hit the standard you’ve set. If we assign this task to a computer how accurate will that computer be? If human does it, will they be unerring in their judgment?

    6. Claim: LAION procured every piece of art legally through Common Crawl

    First, what is Common Crawl? Common Crawl is a nonprofit organization that maintains an open repository of web crawl data. This data is collected by periodically crawling the web and storing the resulting data in a distributed and open format. The goal of Common Crawl is to make this data easily accessible and useful for research, education, and other purposes.

    Now how do we know it was legally procured? Websites such as ArtStation have it listed in their terms of service stating:

    “Your Content may be shared with third parties, for example, on social media sites to promote your content on the Site, and may be available for purchase through the Marketplace. Accordingly, you hereby grant royalty-free, perpetual, world-wide, licences (the “Licences”) to Epic and our service providers to copy, modify, reformat and distribute Your Content, and to use the name that you provide in association with Your Content, in connection with providing the Services; and to Epic and our service providers, members, users and licensees to use, communicate, share, and display Your Content (in whole or in part) subject to our policies, as those policies are amended from time-to-time.”

    “Shared” is the key word here and it’s a pretty big gray area what that even means. Most of the time (myself included) we skip over these Terms of Service and don’t give it a second thought. Even if I did understand this legalese I don’t know what the potential implications of the rights I’m giving them has the potential to do.

    Some ways to fight against Common Crawl is if you host your own website is to employ a nofollow script so that Common Crawl won’t crawl your website for information. If you find your work on Common Crawl you can submit a copyright claim. Your success in this situation depends on how well you can demonstrate that your images are being redistributed without being transformed.

    If creating art is part of your livelihood (and even if it’s not) we need to be adamant about reading and researching the Terms of Service. This is a prime example of how the public is potentially being taken advantage of without even knowing it.

    Update: Artstation has now allowed artist to opt in or out of being a part of an AI database. It has been met with mixed reviews on the process.

    I learned about this first from this Twitter thread by
    Gothlytical Art
    .

    7. The Lensa App, Midjourney, Dalle 2 and others

    Lensa uses Stable Diffusion but we don’t know what model they used. As for Midjourney, Dalle 2, and others the dataset they use for training isn’t available to the public so there isn’t any way to tell what is being used. Now people/companies/whatever are innocent until proven guilty (at least here in the USA), if we are going to hold Stable Diffusion accountable then shouldn’t we force(?) the other AI generators to make their dataset public as well? Or does that infringe on some other right? I don’t know.

    If we are going to hold them accountable we also have to look at their original intent. Did Stable Diffusion remove the ability to reference contemporary artists because they were wrong or because people were pointing fingers? Did they take this action to improve their public image or was using contemporary artists actually wrong for them to do?

    8. Claim: The signatures that are generated on AI Art is proof that the art was stolen.

    While on the surface this argument makes sense, let’s dive in and see how valid it is. Since we now know how AI Art works it’s inevitable that when it’s learning that signatures may arise because of the dataset it was based on. Many artists in our current age will sign their work as a way of authentication, and those artists who do obviously have copyright to their work, but does the signature mean they have copyright?

    No.

    If we look back in history, the act of signing your work isn’t new. Currently with how copyright law works is that you own the copyright until 70 years after your death. Thanks Disney. After that it becomes public domain. So if we have evidence of painters for example since the 17th century signing their work with a signature and the AI decides to mimic that and create its own version to create something that feels authentic does that mean it’s stealing? If the image is public domain I don’t see how it can be.

    Secondly, if we end up having an opt-in option for artists who do want their images to be trained on by AI or the images used are public domain and the signatures still arise, is that stealing? No it isn’t because they opted in. So I find this argument doesn’t hold water very well. No matter the intellectual property, if you have signed away your rights the person who legally obtained the IP can do whatever they want as long as it is to the letter of the contract.

    Lastly, it’s not uncommon that with the prompts that you use for the words themselves to become transposed into the AI image. AI has learned that artists in general will sign their work, so to emulate that practice it will generate some kind of gibberish squiggle because it’s trying to emulate artists.

    Examples of paintings with signatures in the 17th century and others can be found here.

    9. People claiming AI art as something they made by hand

    Just be honest about how your art was created. I see multiple artists who use a combination of Stable Diffusion, Midjourney and Photoshop in order to create something they are happy with. They still have a human hand involved. If you have an issue with that then we need to discuss where the line is drawn.

    10. Why is it that people are upset about AI Art but not all the other avenues that AI is used in?

    AI Copywriting has been around for quite awhile now, being able to write entire blogs or articles. It was trained from millions of literary sources online and yet I haven’t seen any backlash to the level it has for artists. Would that also not affect the jobs of copywriters? Or what about AI being used in rotoscoping or tracking in videos? That is taking away the man hours that someone would do by hand and putting it into the “hands” of a machine. Does that make it wrong? Maybe because AI Art as it were is just more tangible than AI Copywriting and this is the straw that finally broke the camel’s back. I hope that the zeal for ethics in AI Art carries onto others.

    11. Why is it that we have ethics about AI Art and not other things?

    I realize this question is a huge can of worms. At first glance it appears at least to me that because AI Art is the hot new thing that people are allowed to be upset about. You have every right to feel the way you do and that’s fine. What about the other aspects of our lives? Do you research where the materials were sourced and how they were made for everything you consume or obtain? Phones, clothing, cars, food, entertainment all of these have their own processes and the majority of people do not research the practices behind these products. Correct me if I’m wrong but if we are going to have ethics about one thing we should have them about all things yes?

    Now you can argue that we have a chance to change the ethics here because it’s so new and we can potentially shape it before it gets out of hand. On that point I agree. We have already seen changes in Dalle2, and Stable Diffusion 2.0 has already helped move in the right direction.

    I hope that there is some way to take the rush and zeal in this issue and transfer it to other problems like the fashion industry for example. It’s very easy for companies like Shein to be just a flash in the pan in drama and nothing actually changes.

    12. For the sake of argument let’s say that copying styles and using artists’ work for reference is not OK, it is currently completely legal, how do we change that?

    Now of course we have the artists who can have the opt in/out option, and if that works then that’s amazing! If it doesn’t though, what are our other options? If we copyright a style what does that entail? How will that affect future artists? If my art uses a specific tool and I copyright the use of that tool because it’s part of my style does that mean no one else can use it? Now we are on a slippery slope. I realize this could be going into semantics but I would rather cover all my bases and make sure it’s discussed than to leave it alone.

    13. If we as humans use another artist’s work for reference (much like how I understand AI does, in the overall theme) should we not credit artists that inspire us? 

    If creating AI Art needs to have who was referenced in order to make it then all human art should also do so in respect? Art inspires art. If someone creates a mood board as inspiration for their work should every artist in that mood board also be credited? If we are going to hold AI to this level we should also hold humans to the same level. On top of that humans are inspired by things just through everyday life and will forget those little moments or people that inspired them, we’re humans we forget things. So if we do keep humans to the same level of responsibility we should allow for more grace, vs a machine that doesn’t forget.

    14. In what way can AI art (with the Stable Diffusion 2.0 data set) still be used? If I don’t reference any artist and just describe my scene, is that valid?

    In much of my own art currently I’ve been using it as a way to make AI photographs of friends and people who have given their consent or to animate my own work where I describe the scene, use my photo as the reference, and not reference any artists. Does that make it OK? Or maybe I need to make my own models and then that solves the issue. The tool itself isn’t bad, it’s just the copyrighted material that was used is, and or if it’s used for profit, which goes back to again the fanart/cosplayer problem. If you disagree, please expound.

    15. How much human interaction does there need to be for AI Art to become copyrightable or “art?”

    There is no right answer to this question. We know that AI art itself doesn’t have copyright according to USA law. Yet, AI Art when created does have some human interaction if even only typing words into a prompt box. Otherwise AI Art wouldn’t get created at all, it needs a human at some point. So how much of a “percentage” does a human need to interact with AI Art to make it copyrightable? Does it need to be mixed with other pieces of art (AI generated or not) to become something new by a human hand? Do parts need to be changed significantly from the original output?

    There is a current trending case of a graphic novel whose images were made by AI, but the speech bubbles, layout design, and story were created by a human. Does that constitute? We simply don’t have the discourse currently to determine this in the court of law.

    16. What does AI mean for the future?

    When it comes to AI and advancements in technology we need to ask the question, who is it going to benefit the most?

    Big Tech and a few wealthy individuals currently control the advancements in AI. In this system, each advancement will likely bring maximum profit to the already wealthy few, while the rest of the world suffers. Most people share the same fears about AI and the technocrats who have amassed so much wealth and power. However, we (the public) have become divided through many avenues including that of the  “left” and “right”, and this division has created a stalemate in democratic governments in the process of breaking up the monopolies that Big Tech are building.

    If this continues I imagine we will continue towards the age of dystopia similar to that of CyberPunk Edge Runners where only a select few are able to innovate and benefit from technology, while the rest of humanity relies on whatever scraps the elites decide to give them.

    This doesn’t have to come to pass however.

    If we can unify together on important issues overcoming what divides us we can determine the direction that this technology goes and allow it to serve all of humanity and not just the wealthy. Machines have the abilities and potential to do everything a human does at the fraction of the cost when it comes to food, water, medicine, etc but if the public doesn’t take ownership and control, prices will continue their trajectory, rising upwards, and resources hoarded by the wealthy elite.

    Conclusion

    There is a lot of info to go through here and it’s important that you make the decision that you think is right. I’ve done my best to be impartial but I’m also not perfect. I really love this technology and it’s given me the opportunity to work with people I didn’t think I ever would. At the end of the day I believe the issue is using copyrighted material for profit without permission. We are entering an AI Renaissance and nobody really knows what it holds, but hopefully we can remember to keep ethics at the forefront. If the majority on an issue believe something is ethically wrong how does that majority make that into law? When laws in our current time come about it’s because those in power and money either are affected by it or can benefit from it. We can’t trust Big Tech to be ethical, we’ve seen them fail time and time again. It is up to those passionate about the situation to make a difference.

    Huge shout out to those who helped me edit this article and help educate me on those areas I was misinformed on.
  • How to make Vertical Drone Light Paintings

    Before we get started if you haven’t already checked out my previous blog post on drone light painting (these are the basics to get you familiar) then go watch that video first please as I go over everything in a little more detail than in this video than in this one.

    Compared to the Iron Man logo we did in the previous lesson the amount of space that we need to take up on Google Earth Pro is much smaller. This is because when doing a horizontal shape we not only need to be underneath the drone light painting but in order for the proportions to keep their shape you have to be high in the sky and make it big enough for your camera to capture it. A lot of the time your image won’t be perfect because of the distance the drone has to be from your camera, some parts will look squished.

    Another benefit is that sometime I fly my drone in a no fly zone. This from my experiences means up to a certain height but only sometimes. Regardless when doing vertical drone light paintings I only go up to around 50m at the absolute maximum but you really don’t need to go that high for vertical drone light paintings.

    For the next step of our process we are going to do like we did in the last video which is trace around our image using the thumbtacks. option in Google Earth Pro. Like before make sure you number these and change the size to 0.3 as it’s much easier to be precise this way.

    A new trick to help you out is to turn your drone around to hide the light so your camera doesn’t pick it up when going from shape to shape. Normally we would block the camera lens by hand but if you plan this out before hand you can just sit and watch and have less work to do. Of course this also helps you get everything done in camera which is always more satisfying.

    In the above image I started our shape on point 1 which is exactly where 7 and 8 are. Not to mention that 9 and 10 are also in the same spot. This is how we will be rotating our drone. Once 7 is placed go ahead and copy it and relabel it 8. Then create point 9 and 10 doing the same thing. We are going to make a note here that 7 is the last point before we start rotating and will rotate 180 while moving to point 8. Point 9 will have the same heading as point 8 and then 10 will be flipping back to the original heading.

    I know this may sound confusing but just trust me on this I’ll include an image below of a list that I used specifically for this shape.

    Now that we’ve completed our shape we are going to export our folder as a KML and import it into Litchi. Once imported into Litchi you’ll see your path in it’s horizontal form like it was in Google Earth Pro. You’ll then download it as a CSV.

    Once you have it you’ll then go to this tool created by some amazing people in my drone light painting group. Once you’re in go ahead to File < Save a Copy in Drive so you can reference your own vertical drone light painting tool later. Then go ahead and press the play button. The Python will start running and go ahead and press the down arrow on your keyboard and then the up arrow to get in you the right spot

    Find the Choose Files button, and navigate to your CSV and upload it. You will then be asked to put in your minimum altitude in meters. When choosing this remember that where ever your first way points starts it will determine that as the base point for the minimum altitude so it’s important to keep that in mind. I generally go with 20m.

    Next up it will ask you to enter the desired inclination angle from 0-180 degrees. For our case we are going to input the number 90. After you have put into these values press enter a bunch of times because the rest are important for this tutorial. Once you’ve clicked Enter enough it will download the new CSV with all the latitude on the same plane.

    With our new CSV we can now upload this into Litchi again. Once uploaded you’ll notice that all of our points are in a straight line and you can’t see the shape anymore. Remember that list we made awhile back? Now it’s time to use it. You are going to navigate to the points where they turn 180 degrees. In our case the first point for us is 8. Now if you were to try and run this flight path you would get an error because 7 and 8 are on top of each other. In order to rectify this we are going to adjust the latitudes for the 180 degree numbers by about 20. So for example if our latitude for all numbers right now is 38.831338 we are going to adjust those 180 degree numbers to a new latitude of 38.831349.

    Make sure to also change the heading to 180 degrees for these numbers as well in in the same window. I’ll show an example of the window below which you can get to by simply clicking on a number with the Litchi browser. Note: This has all the latitudes for a specific number in the proper place already.

    Once you have all of your numbers moved in latitude and rotated 180 degrees it’s time to export the 3D KML to make sure it looks good in Google Earth Pro. Before you do this make sure to check your settings in Litchi and turn “Online Elevation” on as you can’t export a 3D KML without it.

    Our vertical light painting looks good! So make sure to save your path in Litchi and go outside and fly it. Of course please fly responsibly and try not to hurt yourself or others. Below is a gif of my flight when I did the Lumecube Logo.

  • 2D Animation Drone Light Painting

    Before we jump into this blog post if you haven’t already read how I do drone light paintings horizontally in the sky be sure to check this out here. If you have done that already (or don’t wanna read something else) get ready to have your socks knocked off because we are flipping them into vertical space and animating our light paintings all with stop motion.

    To create this effect we use a similar process as I did in the link I mentioned above, but with a couple twists. First off thanks to Oliv Yeh and Krzysztof Dziądziak for making the original math to help make this possible. Secondly, huge thanks to Jonathan Bogaert and Jacco Veldscholten for writing code to make this whole process easier. I’m going to give a little backstory and then the process (but if you don’t care skip the next couple paragraphs to get to the pictures). Krzysztof Dziądziak had come up with some math to convert horizontal light paintings into vertical ones using excel math. This basically consisted of taking the first latitude with your way points making it the same across all points. Then some extra math with how many meters in 1 degree of the Earth and altitude to make sure it was displayed correctly vertically in the air, but the process of doing that in an excel spreadsheet could be a bit confusing. It’s also very important that when using these calculations that your overlay is facing north to south otherwise the math doesn’t work. For clarification this means that the top of your overlay should be north and the bottom should be south. Once you’ve mapped out your drone light painting using the original tutorial linked above then you can use this program that Jonathan and Jacco created to translate it into a vertical light painting. It’s all done online and you just need to use a CSV file which you can download from Litchi after you uploaded the original KML file you created. Let’s get to the animations.

    My first animation needed to be simple and was before I had the excel spreadsheets or anything that made this whole process easier. So I decided on a quick game of Tetris. I found a youtube video that played through Tetris and mimicked the movements screen capturing them so I could make layers in Photoshop and have a timeline on which frame came first. I chose Tetris because it’s in a grid and I could calculate how many meters in altitude the piece would need to move vertically for each frame. The next part is hard to explain. I placed the overlay in Google Earth for that specific frame and measuring the length on the ground applied that vertically into the air as altitude for each shape. This was a total of 23 frames at ISO 200, F-Stop 6.3, around 60 seconds for each frame and three drone batteries.

    This was the second animation that I created using drones and stop motion. It was a total of 10 frames with ISO 100, F-Stop 10, around 172 seconds for each picture and two drone batteries. It took around 11 hours from start to finish for the whole process. The concept of using a horse was inspired when I was reached out to by a marketing company to do a drone light painting of a horse above the L.A. skyline. I didn’t end up getting the bid for the company they were representing but it made me want to take their request to the next level. I’m no animator myself so instead I found some of the oldest chronophotography as my basis known as “The Horse in Motion” to make this drone light painting. The story in a nutshell is that a man named Leland Stanford wanted to see if that when a horse gallops if at any one moment in time that all of it’s legs are off the ground simultaneously. Turns out there is such a moment! If you want to learn more about the history of Muybridge taking the photographs you can read about it here.

    My third animation I wanted to try and push what the idea of writing in the sky with a drone would be like. I had seen DariusTwin do this with his stop motion writing animations and didn’t know how time intensive it would really be. For the first attempt I just wanted to see what was possible so simple letters was more than enough for me and it turns out was the perfect first experiment. I shot at ISO 200, F -Stop 10, a variable exposure time of 14 seconds to 210 seconds and 5 drone batteries. For every frame after the first I had to write out each letter piece that was previously done which makes my exposure times longer and longer. After using 5 drone batteries my remote for the drone started complaining that it was on low battery so if you want to attempt something like this make sure that everything is charged or have spares.

    My last and most current 2D animation is a running pikachu! This one was leaps and bounds harder than the horse. I wanted to see what it would be like to have a looping animation that wasn’t just a static image in the sky and this was the result. I used an animation provided by LordLibidan to create this. These 11 frames were shot at ISO 100, F-Stop 10, around 209 seconds for each image and 4 drone batteries. The challenge in making something move across the sky smoothly is knowing how many pixels I need to move each frame of the animation. Thankfully I was able to ask my friend Heather who does animations her opinion on this and she stated it would be around 8 pixels moved to the right for each frame. To give you an idea of how this looks in Google Earth here is a picture.

    To make sure this would work I did a test run of my framing of the beginning, middle and end frames to try and weed out any errors when it came to shooting this and making sure I didn’t crash the drone into anything. Turns out my testing wasn’t enough however as I originally had 12 frames planned out, but on the 12th frame my drone got stuck in a tree 20 feet up and I had to throw a couple of C batteries at it to get it to fall down. Thank goodness I’ve been learning how to repair them.

    I believe we are still just at the beginning of what can be done with drone light painting and it can be pushed even further. I’m so excited to see where it goes and so grateful to have a community around me that is willing to explore this new frontier.

  • My Light Painting Cancer Journey to 2019

    So as much as I dislike it it’s been brought to my attention that I need to talk about myself. I’m honestly not very great at it because I care more about sharing my work and how I’m pushing it then anything else. So let’s start from the beginning of my photography journey.

    Back in 2016 I was working on a Netflix movie called “Our Souls at Night” we had an early morning shoot with the B-Roll team and I was working Locations so had to be on site to manage. As B-Roll team was driving up the hill at Cottonwood Pass I happened to see people taking pictures of the mountains during sunrise and decided to take a couple snaps myself. It was really the first time I thought I might actually have a knack for doing photography. It was my original inspiration. See the picture below.

    After that movie I bought my first decent camera a Sony a6300. I played around trying to do portraits and understand photography for around 6 months after the movie was over. It wasn’t until I was trying to shoot fire performers (as I have several friends who do circus work) that I stumbled across the work of Eric Pare with his light paintings and basically became obsessed from that moment on. This is one of my first attempts at a light painting with my dear friend Hannah. This was in the summer of 2017.

    Coincidentally at the same time I came into light painting I also had my first symptoms of cancer. I certainly didn’t know it at the time but the slight pain in my leg that I would get when I was active would grow to become something entirely worse. With what started out as a minor nuisance grew to be a big problem. Becoming lower back pain, GI pressure, and nerve damage to my leg from the tumor pressing down on my internal organs. During this time I was only focused on tube light painting as I wanted to try and master a specific style before I moved onto other light painting tools.

    In September of that same year I had a trip planned to New York City to visit my friend Rachel and learn from my favorite dance photographer Jordan Matter. The amount of agony I endured on the plane is kind of ridiculous. I had a layover and was lying down using a heating pad in outlet just to try and ease the pain, and I thought I had like pulled something. While I was there I made some custom tubes that I bought from Home Depot as all my tubes were custom and I learned how to make my own light painting tubes from Eric Pare Youtube videos. I did some light painting with friends while I was there and it was truly a great first time experience. It was also during that time that I noticed my stomach couldn’t hold as much food as I was used to and it was very confusing. Here is a light painting picture that I did while I was there.

    After my trip to New York City I came back home and was still just as miserable and after trying the chiropractor, acupuncture, and every other non traditional medicine I decided I would actually start seeing a doctor. I remember the moment when they weighed me that instead of the 133 pounds that I normally weighed I was 112. That was a big shock to me and I think I remember mentioning to one of the nurses there but she didn’t react so I didn’t think it was a big deal. The doctors took some blood draws and such and I went on my way and was supposed to check back in, in two weeks.

    Honestly, I didn’t have time for that. I would go to work as usual be miserable and then go home and lay in bed trying to just survive. I was living at home at the time and my parents would come in and were so worried. Rightly so. They convinced me to go to the emergency room (which honestly is such a misnomer because I thought it was only for emergencies but ok) and once I was checked in they took me for a CT scan and admitted me basically immediately. I remember the moment the doctor and a nurse were looking at the CT scan and the nurse couldn’t find the tumor because she was looking for something small and not something that was MASSIVE. Here is a picture of that scan. That thing circled in red is the tumor. You basically can’t see my stomach. It’s been smushed. You can see a tiny bit of it in the yellow circle.

    At the time however we didn’t know it was cancer and I has to wait over the weekend in the hospital for a weekday because they didn’t do biopsy’s over the weekend. Finally on Monday I had a biopsy and by I believe Wednesday I had the beautiful and literal rude awakening at six in the morning that I had cancer.

    It was a tough next three months as I didn’t have much energy and I could barely walk most of the time but when chemo was finally over I started to feel pretty normal again. It wasn’t soon after that I started to light painting again as I had been starved the past 3 months. I got a couple of shoots in and then had to go to surgery to finally remove what was left of the cancer. After the 9 hour surgery I had to recover in the hospital for a week which was miserable. The tumor was the size of a banana (around 7 inches long) it had shrunk due to the chemo. I have a picture but it’s pretty gross. A couple months later I was hiking in Arches National Park and created one of my favorite images to this day.

    After something like cancer you can imagine that you want to do all the things. And I did, but not really. It honed my focus more on what I want to do and how I can push light painting. People told me that my hyper focus would fall over time and it waxes and wanes sure but I’m still looking towards the goal on how I can get to where I want to be. And nothing is stopping me.

  • Combining Gels and Light Painting

    In this quick blog post we are going over on how we can combine gels photography and light painting! Watch the video above if you prefer that media.

    To start the gear that we use in this video for the gel section are:

    • 3 XPLOR 600’s

    • 3 C-Stands

    • 2 orange gels

    • 1 blue gel

    • 3 silver umbrellas

    The light painting gear used are:

    • Visual Poi

    • Light Painting Brushes Screw On Color Filters

    • Light Painting Brushes Diamond Plexi

    • Light Painting Brushes White Fiber Optics

    • Ants on a Melon Bit Whip

    • NiteCore MT22C Flashlight

    The light setup was the same for all of the photos. We have the blue gelled light in front and raised up, while the orange gelled lights are to the side and behind her. All around around 6 feet from the model. When light painting all of these images I made sure I was out of frame so that when I flashed with the strobes I wouldn’t show up in the picture.

    Camera Settings

    ISO 100

    F Stop 5.6

    Shutter Speed 9 seconds

    Flash Power – Blue gel 1/4 power, Orange gels 1/8 power

    With the visual poi I used the A/B mode to split the colors of orange and cyan. I attached the Visual Poi to an extender and then I started in the middle of her back and rotated in a circle starting in a small circle and slowly getting bigger. This is why I needed the extender.

    Camera Settings

    ISO 100

    F Stop 5.6

    Shutter Speed 16 seconds

    Flash Power – Blue gel 1/4 power, Orange gels 1/8 power

    To create this effect we need to use the Light Painting Brushes Diamond Plexiglass blade and that’s it! All you need to do is place the flashlight in one area, turn it on, turn it off, move to a new space and repeat. Do your best to space out where you want the crown to be in your mind so you do overlap if you want it to look cleaner!

    Camera Settings

    ISO 100

    F Stop 5.6

    Shutter Speed 7-9 seconds

    Flash Power – Blue gel 1/4 power, Orange gels 1/8 power

    To create this fire like effect I only used the Ants on A Melon Bitwhip and a Screw On Color Filter from Light Painting Brushes. I simply started the exposure then threw the whip around all crazy like to create the effect.

    Camera Settings

    ISO 100

    F Stop 5.6

    Shutter Speed 12 seconds

    Flash Power – Blue gel 1/4 power, Orange gels 1/8 power

    In order to get the halo like effect around Paige I used the white fiber optics from Light Painting Brushes and a blue screw on color filter. Then I simply shook the fiber optics as I went around her body

    Camera Settings

    ISO 100

    F Stop 5.6

    Shutter Speed 6 seconds

    Flash Power – Blue gel 1/4 power, Orange gels 1/8 power

    For this last image I used the screw on orange color filter and the diamond plexi from Light Painting Brushes. Hit her with the flash then made infinity like patterns behind her to make that wispy effect.

  • How I do Top Down Light Painting

    If you would prefer to watch a video then watch it above instead of reading!

    I was originally inspired to do this because when I had down it with a drone I had a troll complain that the images weren’t clear enough. In my response to this I surmised a way with the help of Dan Roberts to be able to hang my camera from the ceiling and get clear images.

    In order to to get to get surreal like images that look like your camera is hanging in the air without a drone and get a clean image this is how you do it! Now full disclosure I have the blessing of being in a space with 14ft ceilings that allow me to get this much room with a 24mm lens. However I have successfully also done this with a couple of c-Stands and a long piece of somewhat thin wood as well. Forgive me for not remembering the measurements it’s been over a year. I used this video as a basis for the idea with the c-stands.

    If you are going to go the c-stand route and want to capture people then I recommend using a 12mm or 14mm lens as you won’t be able to get 14ft high with c-stands. Of course the base of the c-stands will show up so you’ll need to be cautious of those when light painting and edit them out later. You can use a simple wood to screw attachment or a Platypod for this setup.

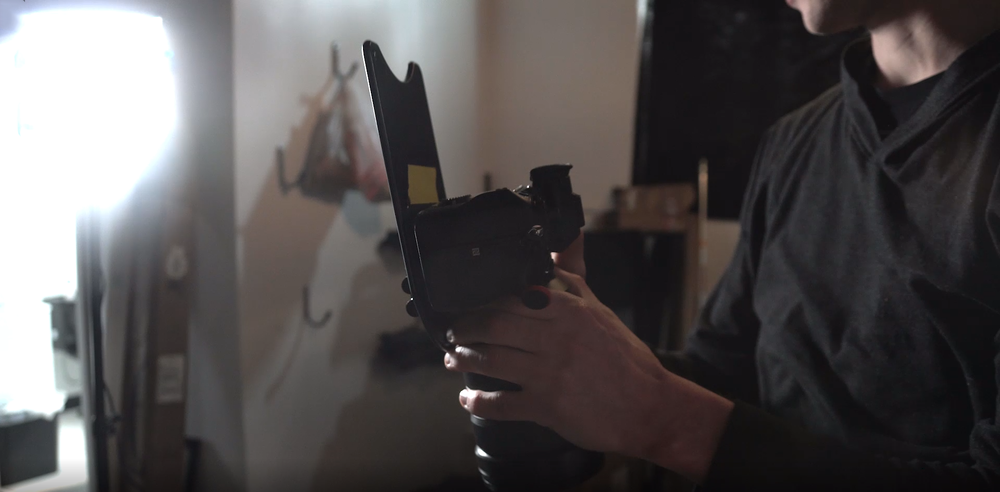
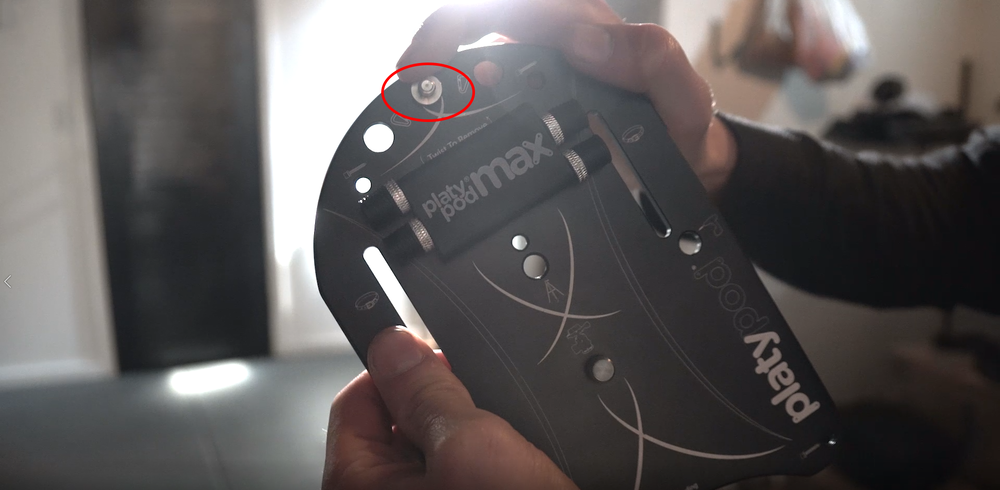
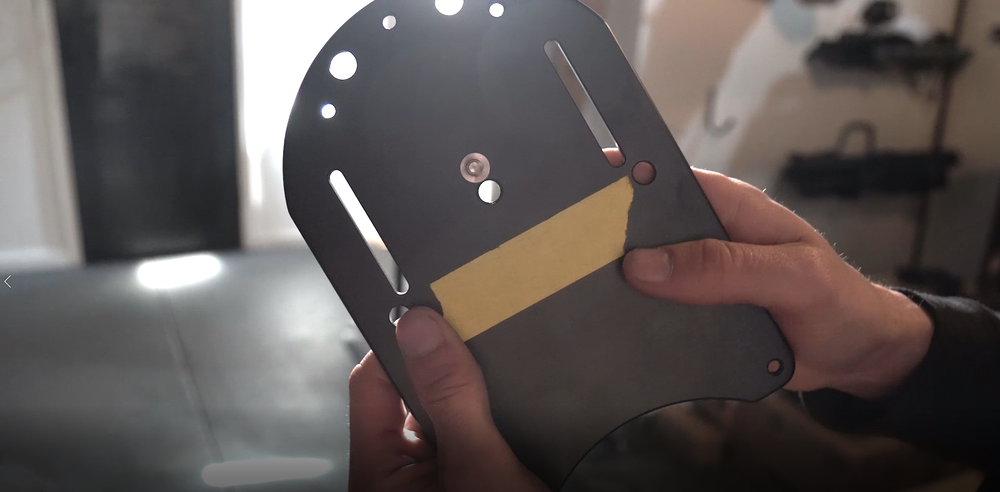
    Back to 14ft up, one of the most important pieces to this setup is a Platypod. They run around $100 dollars and have been invaluable to me. There is a little screw portion at the top of the playtpod (circled in red) that you will flip onto the back and then attach your camera to. Here are pictures to help understand that process

    Screenshot (1).png

    Screenshot (2).png

    Screenshot (5).png

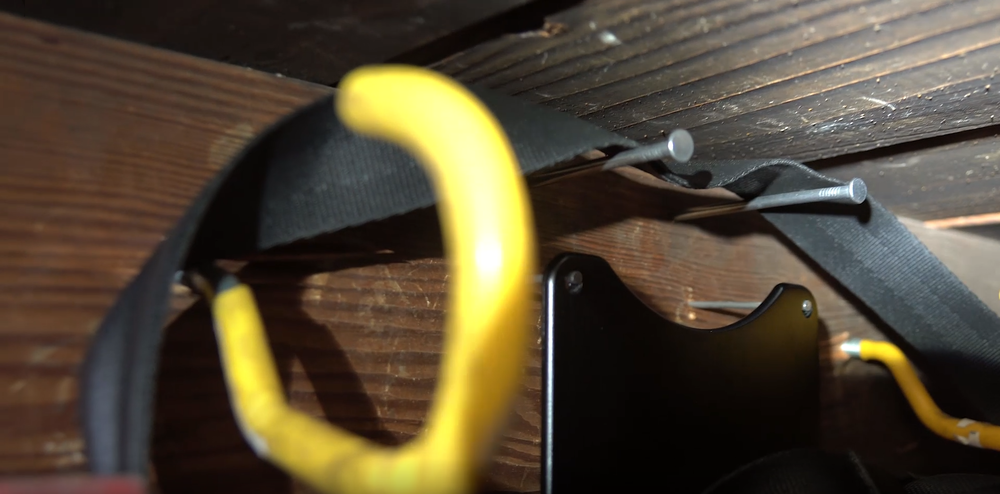
    Once you have the platypod attached it’s more than likely not going to be a tight fit, and that’s ok. As you’ll see in the below picture I have a couple of small nails that I’ve hammered into wood as well as some bike hooks. I make sure to have a strap or some other kind of solid material to latch onto the camera and hang onto the bike hooks for safety. Since the camera in order to be straight down hangs on the ends of the nails I want to be sure that it won’t fall and hurt my model or the camera. As always use proper ladder safety when climbing this high and up.

    Screenshot (6).png

    Now the second important piece to this is how I’m going to trigger the camera while it’s 14ft above me. Thankfully, most major camera companies have apps that allow you to connect your phone to your camera and let it become the wireless trigger. I personally use a Sony and use their Imaging Edge Mobile app. You’ll open the app to scan the QR code with your phone on your cameras LCD screen. To get there you’ll go to Network – Control with Smartphone – Connection. I recommend that you connect to your cameras wi-fi if it doesn’t already and let it stay connected. Once you have it connected then I suggest hanging the camera from the ceiling and using the phone as a reference to then focus your model on the correct plane. When connected with your phone you will be able to change your shutter speed, F-stop, and ISO as well as being able to see the picture you’ve taken once you end your exposure.

    Once you’re done focusing you’re good to go! Next I’ll be going over the specific tools I used to create the images in the video. For all images I use a flashlight as my light source and the Light Painting Brushes Portrait Light to light the people.

    _DSC4325-Edit.jpg

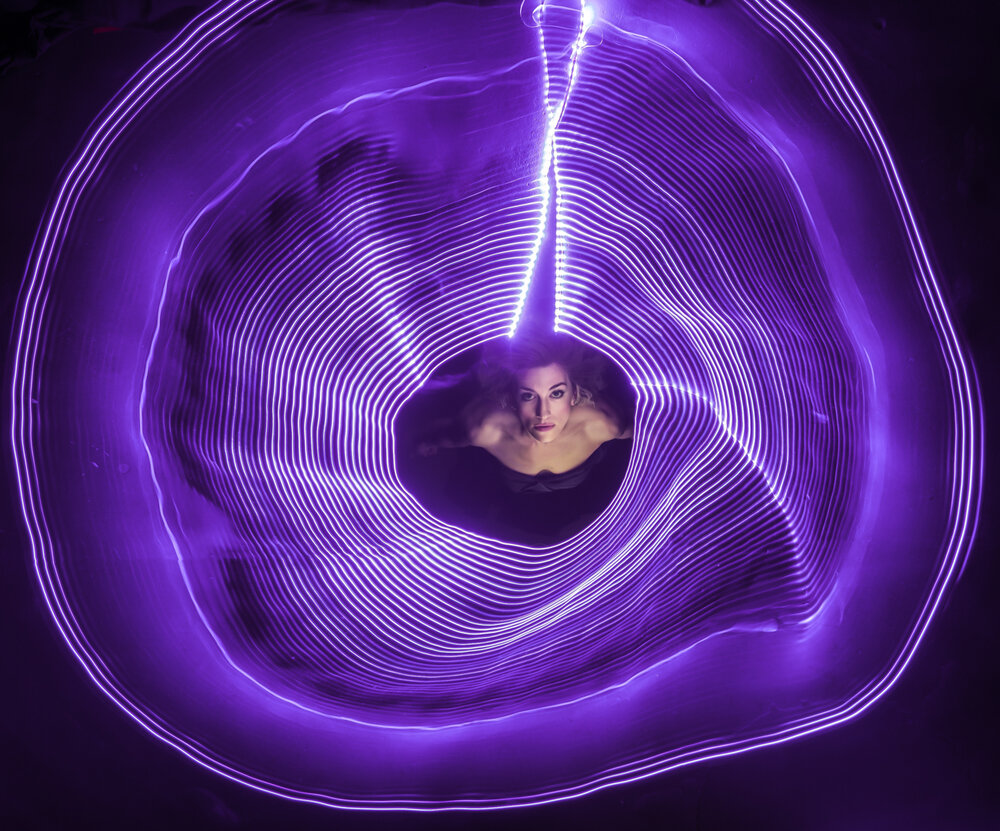
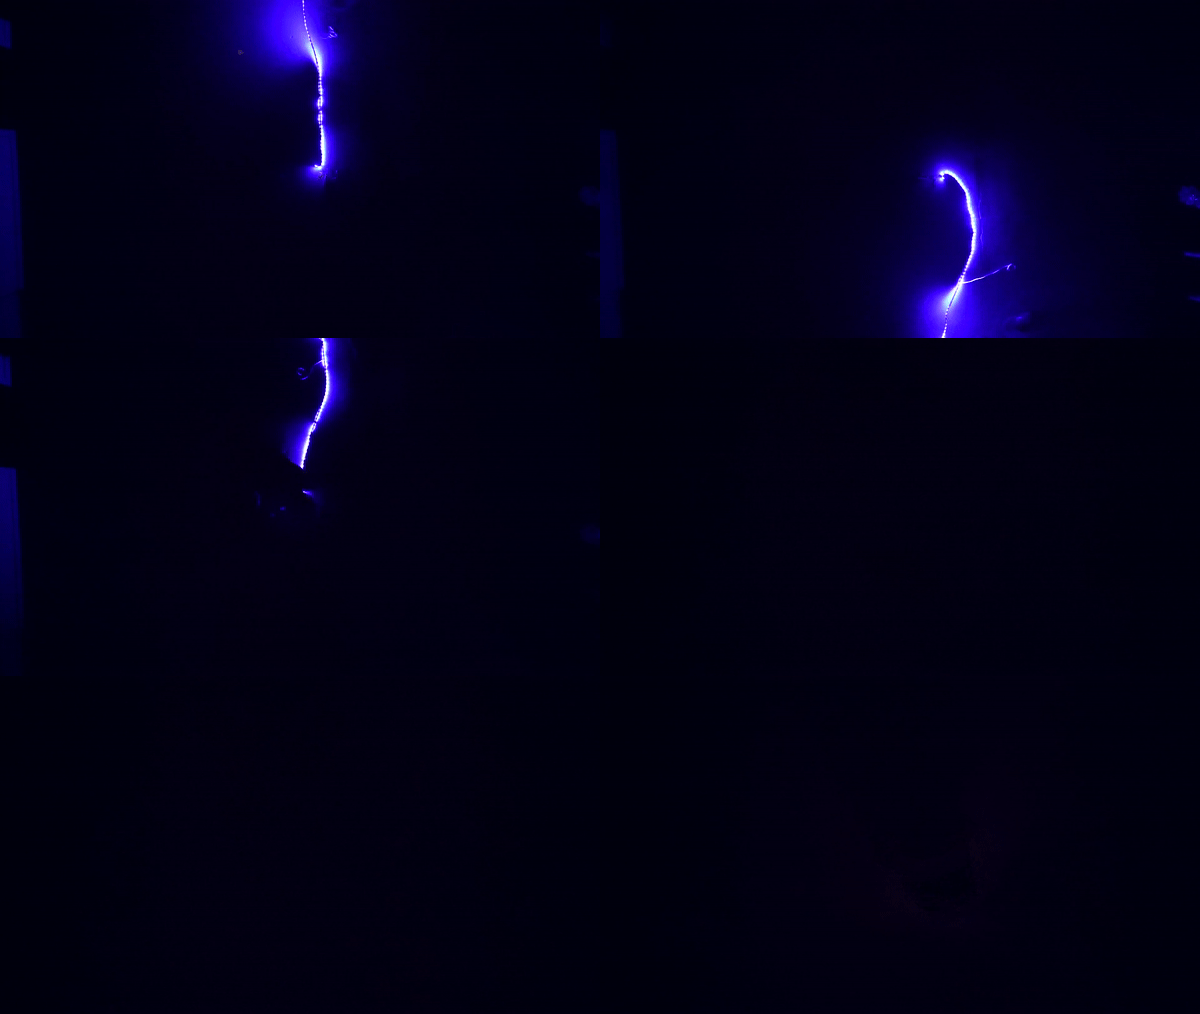
    For this first image I used a simple USB LED strip that I bought from the store that people normally use for computers or TV’s and a small USB battery. Then we determined the center area of the room where I wanted to make the light dress/vortex. I had Sammy start the exposure for me while I waited to plug in the battery. When the exposure started I turned the lights on walked around the room holding the strip up as much as I could, then turned it off with a remote. Then Sammy found me in the center in the dark and I took the portrait light and lit her. Here is a reenactment in GIF form.

    ezgif.com-video-to-gif (5).gif

    _DSC4287-Edit-Edit.jpg

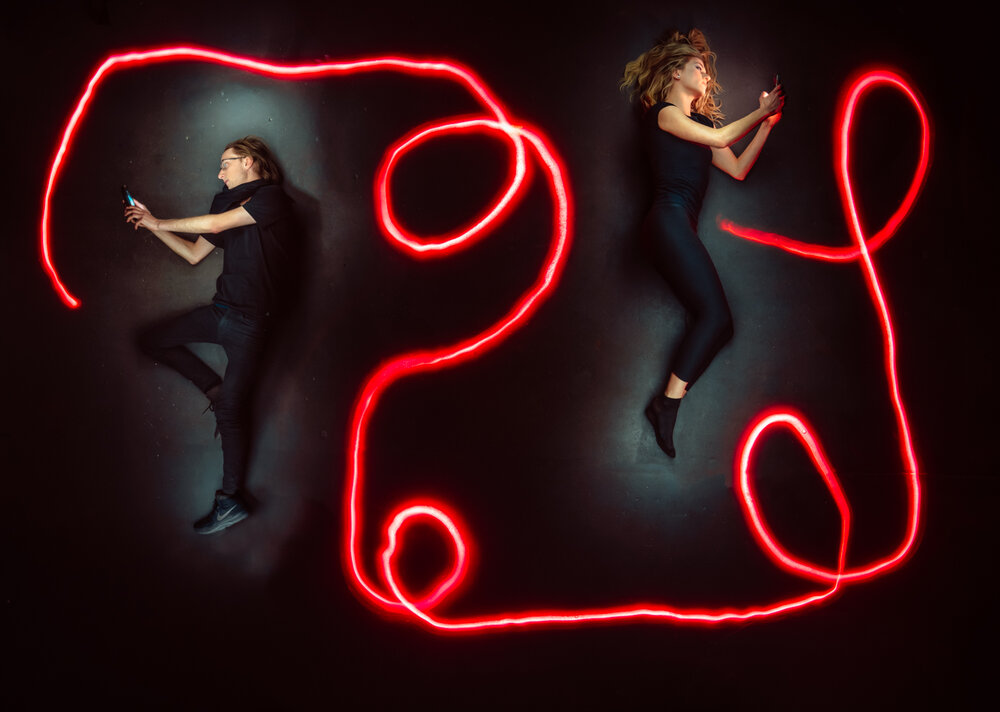
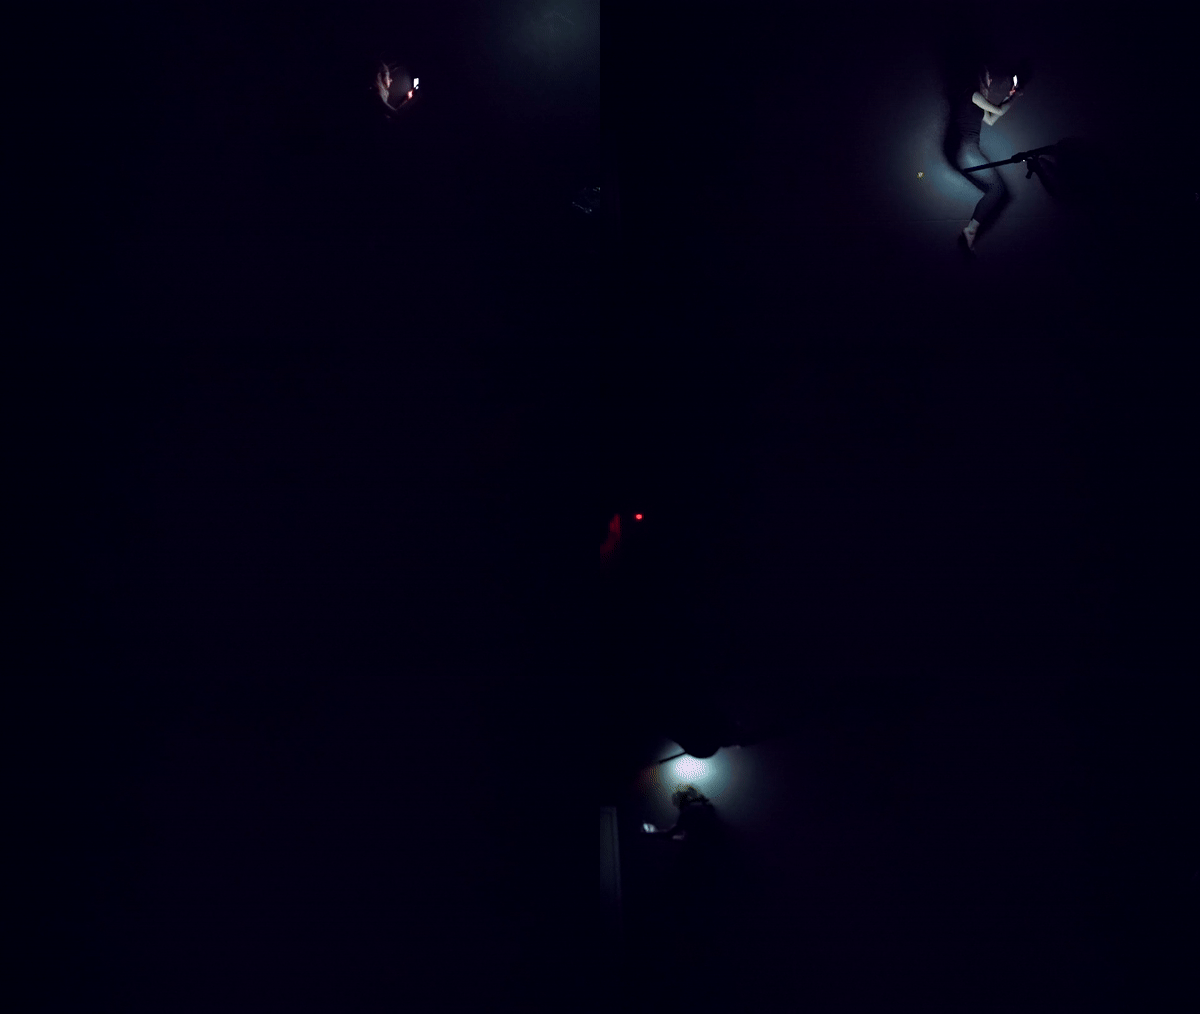
    For the second image I used tools from Light Painting Brushes. These tools are the Screw On Color Filters, Portrait Light, and Universal Connectors. I first determined the space we needed to use for both of us and where I would end starting on the side of my friend Sammy. As soon as we started the exposure Sammy turned on her screen to get a nice glow and I lit her with the portrait light. Then I took the Screw on Filter and put it with the flashlight close to the ground to create the trail. Once I had guesstimated in the dark where I wanted the trail to end and where I would lay I turned on my screen and Sammy lit me to finish the image. Here it is in GIF form.

    ezgif.com-video-to-gif (6).gif

    _DSC4308-Edit.jpg

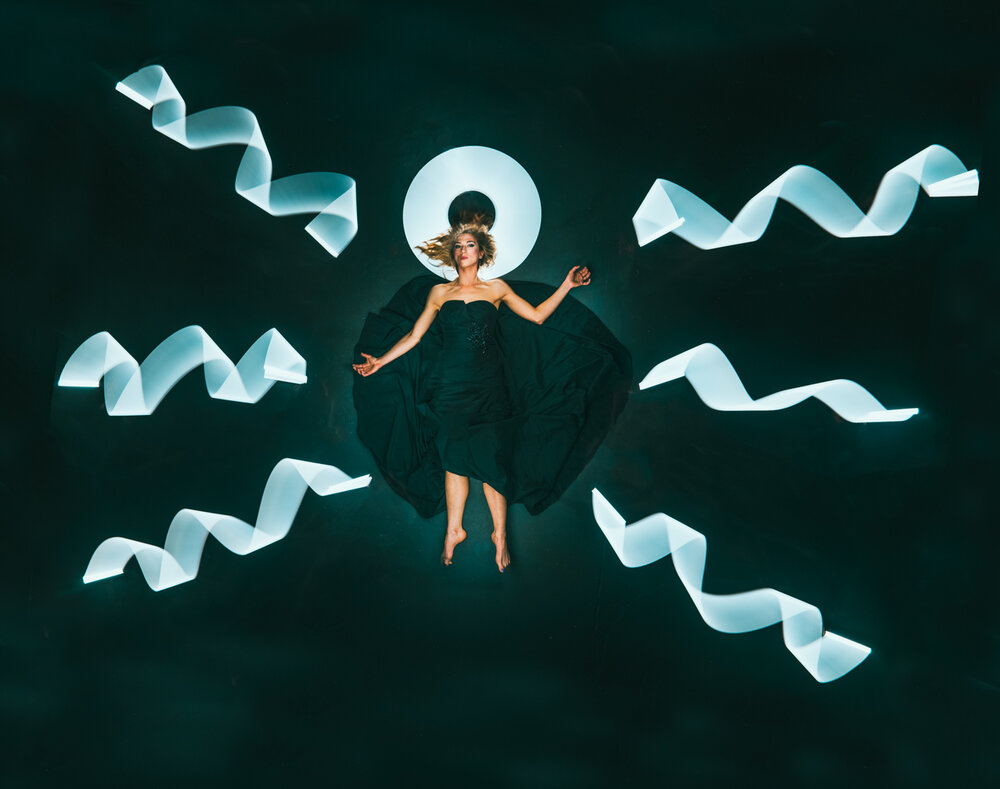
    In our last picture we only used the Light Painting Brushes Portrait Light and it was my favorite image! The most difficult portion was doing the headdress halo behind Sammy’s head. I had to be sure not to let my arm block the light when doing the circle. Sammy had to lift her head during the portion so I could make the circle more easily. Then I simply lit her with the portrait light and created the white waves emanating from her by going to each section around Sammy.

    ezgif.com-video-to-gif (7).gif


    These are of course only some examples of ideas that you can do using a top down system and gives us a new perspective when creating with light painting. I’m not the first to do this concept but there are not many light painters out there using a top down system, and wanted to share my process. Below are a couple more images that I’ve created using this system. Thanks for reading!

    _DSC0694-min.jpg

    _DSC5133-min.jpg

    _DSC0696-min.jpg

    blueorangebri-min.jpg


    Tutorial, Education

    Russell Klimas
    March 29, 2020
    top down, tutorial

  • What Is The Best Subject Light When Light Painting?

    If you would prefer a video version then then be sure to watch the video above!

    A majority of the time I would say that most people who do light painting portraits want to see the person being light painted. We are going to cover a multitude of different options that you can do for this and the pros and cons for all of them. These include: Ambient/Light from a Tool, Flashlight, Flash, Constant, and Portrait Light. Each section will have a picture that shows my results with each light.

    Ambient –
    When using ambient light to light your subject you are allowing the light from the tool as well as any other light sources such as street lights or the moon to light your subject with their soft and natural luminescence. The biggest thing to account is that your subject doesn’t move at all during this time otherwise some blue may occur. This is a little different in a studio setting because there won’t be any ambient light and only light from the tool which could create interesting shadows.

  • 5 Things You Need to Have to do Light Painting Photos

    It’s come to my attention that we need to talk about the necessities. The bare necessities for light painting portrait photography. So before you read anything else on this website read this blog post as it will set you on the right track on where to go. This includes other items other than a camera because that is implied for photography.

    1. Darkness
    In order for light painting to work you are going to need a dark area. Keep in mind it doesn’t need to be completely dark but the less light the better in most cases. Since we are doing a long exposure the more ambient light there is the quicker our tools we need to move and the brighter they have to be. If you are dealing with a lot of ambient light (yet still at night like in the city) I recommend an Olympus camera that have Live Composite. This will allow you to expose for your scene first and then you can light paint on top. It’s an incredible useful tool for these instances.

    2. Black Clothes
    Black clothes are incredibly useful when light painting. The biggest reason to wear them it because it makes you less visible when creating a light painting picture. You become visible generally when light falls on you during your exposure. Nobody is perfect and often times you are dealing with ambient light or the tool sheds light in all directions. When you wear black this lessen the chances of you showing up in the picture because black absorbs light instead of reflecting it.

    3. Tripod
    Tripod are basically a must have because they allow you to set up anywhere with you camera, and of course you can’t move your camera during the exposure when doing the traditional style light painting portraits. Honestly any kind of tripod will do but I recommend that you get a decent one that has some weight to it as it’s not uncommon to bump into tripods in the dark and the last thing you want to do is knock it over and ruin your camera.

    4. Wireless triggers
    While these aren’t absolutely needed they make the entire process easier. Having a wireless trigger for light painting is so important because it allows you to focus more so on the light painting (and saving time) versus setting up a timer on your camera, starting to the countdown running to your spot and then hoping that the time you set the camera for was long or short enough to make your picture come out how you want. With a wireless trigger you can start your exposure exactly when you want and end it when you want. And the time saving comes in by removing the timer and not having to run back to the camera every time to start your next exposure.

    Canon Connect App
    Android

    Iphone
    Nikon Wireless Mobile Utility
    Android

    Iphone
    Sony Imaging Edge Mobile
    Android

    Iphone
    The app we will be using on our phone to change colors:
    Android

    Iphone

    5. Flashlights
    Now of course the most important thing we have when doing light painting is our light source, and flashlight specifically. The reason I say flashlight and now just light is because there are SO many tools that you can use that use flashlights as their main source of light and use. Here is a list of a couple websites that sell tools that use flashlights. As well as some good variations for your to start with.
    Light Painting Brushes
    Light Painting Tubes

  • What Does it Mean to be a Light Painter?

    I have been obsessed with light painting for a couple years now and believe that I identify as a light painter there is a certain hierarchy that can apply within the community. There isn’t one that is superior to the other just different, as photography is mostly subjective with elements of objectivity. These tiers have been pulled from www.lightpainters.com and I think they represent the different levels well. We will go over all of them from top to bottom as they build on each other.

    SOOC
    Full Image Levels, one exposure
    Spot Editing, One exposure
    Live Composite (either SOOC or editing)
    Layers, Photoshopped, or significant editing

    SOOC – Or Straight Out of Camera is exactly how it sounds. Literally what you see is what you get. No editing of any kind on a computer. For most light painters getting something SOOC can provide no better feeling of accomplishment and you feel amazing when it happens.
    Full Image Levels, one exposure – Similar to SOOC except adjustments such as highlights, white balance, whites, blacks, etc. are allowed but no other editing of any kind.
    Spot Editing, One exposure – Spot editing means that if we end up seeing an extra light like an airplane or or someone’s feet that we don’t want to see we edit it out. This is only in reference to taking elements out of your picture and not putting any elements in.
    Live Composite (either SOOC or editing) – Live Composite can be tricky because it is done IN camera but has an editing like effect to it. Basically for Live Composite to work you are creating a kind of double exposure. First you will exposure for your environment for a determined numbers of seconds for how bright you want it to be. Then once that is done your environment won’t overexpose like it would for a traditional camera and instead you can add in your light painting after words. This is very useful in bright ambient areas like New York City at night.
    Layers, Photoshopped, or significant editing – Once you’ve added more than one layer to your light painting photo or added things into the photo you are on this tier. This can be a variety of different things and at this point the sky is the limit. One of my personal favorite artists using this technique is Atton Conrad with his light painting dresses. Absolutely gorgeous.
    https://www.instagram.com/p/BpUTaCyASQt/?utm_source=ig_web_copy_link
    The most important thing to remember is that at the end of the day you use light painting how you want to use it. Sure there will be purists who might scoff in your direction because you used Photoshop to enhance your photo, but when it comes down to it those people don’t matter. The public certainly doesn’t care if it was done in camera and more importantly if you are doing it for a client you should be delivering the best consistent content you can for them.
    As for me I love the challenge that light painting provides. There are so many options in not only how I can push myself but just in possibilities! Traditional photography most definitely has it’s own merits but doesn’t make me feel like I’m embarking on a new frontier like light painting does. I especially feel this way with drone light painting because I’m doing things that have never been done before with a single drone. Let me know what kind of light painting you enjoy, I’d love to hear from you!

  • How to Light Paint Using Your Cell Phone

    Now that we’ve covered the basics you want to start light painting but you don’t have any tools currently or don’t want to wait? Well I got you covered. You can either watch the video above or follow along with the rest of the blog. First you’ll need to go to the Google Store and download the Color Flashlight application. You can do this here. It is a bit of a misnomer as it doesn’t actually change the color of your flashlight on your phone but the screen of your phone instead. Once you open the application you’ll come across a screen similar to this. You can flip the color on and off by clicking on the button right button.

    Next up we have the rainbow option if you click on the top right button it will bring down a list of three options. Click on the left most option and it will allow you to to choose loads of different lighting options! For our first section we are going to use the rainbow. This is located on the bottom left. I love rainbows and this will create some gorgeous effects. Here is GIF showing you how as well as I picture I created using this effect. If you would like to chance the speed of which the flashing happens use the slider on the bottom of the screen.

    After that we have the police siren option. This specifically allows for only the colors of red and blue to light paint with but it still creates a nice effect. You can get to this effect by clicking the upper right option again and clicking on the siren icon in the middle top. Here is another image created with that effect.
    Last but not least we have just using the flashlight itself! No need for an app for that. However it does make it easier to turn it on and off using the option on the screen. You can switch from the other modes by clicking the top left button. This is what that looks like. Here is a picture that was created too.
    If you want to see how this works in action be sure to watch the video above. All pictures that I took were using a camera on a tripod and I had a remote trigger. You don’t have to have a remote trigger to this this but of course it makes it easier, and of course if you are using your phone as the remote trigger I’m not sure if you can switch between the two. These images were shot at ISO 1000, aperture of 2.8, and shutter speed was around 10 seconds. The reason for the high ISO is because the Color Flashlight isn’t super bright so you need to accommodate by increasing your ISO and lower your aperture as much as you think is necessary. Have fun light painting with your cell phone!