The Ultimate Light Painting Guide
What Is Light Painting?
If you’re reading this then you might have some semblance of what light painting is, but if you don’t in the simplest of terms it’s a long exposure photograph. You might be familiar with images that show car lights or airplane lights going through a photo and you see this long trail. Like this picture here.
A long exposure photograph is slightly different from an average photo that you might take with your phone. When you take a picture on your phone you simply open your camera app, set up your shot, and click a button. Presto! You have a picture that took a fraction of a second. With a long exposure it’s a little different. If you change your settings to allow for more seconds for your camera to take a picture it has become a long exposure photograph now. What makes a long exposure photograph light painting? In my opinion it’s the addition of light sources that are generally not naturally occurring. This can range all over the board and we will be getting into a little bit later, but just remember that light painting is more than just a long exposure photograph.

History
Now that we know a little bit about light painting and what it is how did it start? First let’s define photography. The word photography comes from the Greek φωτός (phōto’s) which means light and γραφή (graphé) which means a ”representation by means of lines” or “drawing” and together mean “drawing with light.” When I learned that little tidbit of information I thought it was so cool that photography is basically light painting in itself!
The original light painters were two guys by the names of Etienne-Jules Morey and George Demeny. Etienne attached a white ball to the end of a black stick and while using the reflected light off the ball wrote out his last name on a black background. George on the other hand attached light bulbs to the joints of an assistant and created his first photograph called the pathological walk from the front. You can see this below on the left and right respectively. If you want to learn more be sure to check out a more in depth history on other light painters here.


Camera Settings
Before we jump into light painting we need to understand our camera and all of the functions that it has. Even for experienced photographers there may be some functions you’ve never bothered to learn that we use or turn off specifically for light painting so don’t skip over this even if you are an experienced photographer.
ISO
How this is pronounced is up to you. Some people say it as the letters they are “I” “S” “O” while others may say “eye-so” whichever you prefer it doesn’t matter as the function is the same. ISO best explained for me is the camera adding in artificial light into your image. Most of the time during the day we have a low ISO because we have the sunlight outside. However when it gets dark or the lighting isn’t very good we might boost our ISO to get a better image and see what is going on in the picture.
What does this mean when it comes to light painting? Now that we know light painting is a long exposure we know it’s going to take in light for a long time so in most cases we would keep our ISO at 100 or lower if possible. There are exceptions as there is with everything that deal with either light painting tools that aren’t very bright and or trying to capture more of your environment, but we will get into more of this later. Below you’ll see a chart on how ISO can change the image while brightening it but also add grain, which is the side effect of increasing your ISO.
F-Stop
The F-Stop or aperture can be one of the most confusing parts for the camera especially for newbies! I know it was for me. If you look at your lens from the front and change your aperture you’ll see these little blades that open and close in a circle. If you’ve seen the TV show Star Gate I find it to be the best representation of what happens in your camera.
The wider or more open the camera’s aperture is the more light is let into your lens, and the smaller it is the less light is let in. What’s really confusing is that the lower the number the more light is let into the camera and the higher the number the less light is let into the camera. Reference the table below to see how it works.
Now of course we have to think about this in relation to light painting and a long exposure. Not only will the length of your exposure effect on how bright your image is but depending on the strength on your light source for light painting this can vary on how bright it’s going to be. The longer the light source stays in one place the brighter it will be but most of the time you’ll be moving that light painting tool.
Shutter Speed
When shooting any normal image with a camera a lot of time we will be shooting with shutter speeds between 1/100 – 1/250 or higher. With light painting in all forms we can range between 1/10 to 1 minute or longer. In the graphic below you can see how movement can affect the image and make your subject blurred. This is why it’s so important in most cases that your subject stays still during the long exposure so they don’t blur. As with F-Stop the longer you expose your image the brighter it’s going to be so adjust accordingly with your shutter speed.
White Balance
When setting your white balance I would say in my opinion this comes down to personal preference in most cases and how perfect you want to get your shot in camera. With most pictures you can recover white balance to where you want it to be in post processing except in extreme cases. The other exception is when you are layering multiple images together, not only does it help you visualize how the final image will look with proper white balance, it saves time trying to match light balance later if you had your white balance set on auto.
Long Exposure Noise Reduction
Or also known as Long Exposure NR in some cameras is often turned on by default. What this function does is during a long exposure the camera does it’s best to remove potential noise that could be in your image. The downside is that depending on the length of the exposure after you’ve ended it the camera will take a certain amount of time in order to do this process. Normally you would assume this is awesome! My camera is helping me make awesome images! And you’re right it is, however at the cost of speed. As someone who has been light painting for 4 years I find this feature more of a hindrance than help because I’m often doing exposures in quick succession and this slows down the process considerably, throw a remote trigger into the mix and then you don’t know when you’re exposing anymore without looking at the back of the camera and it becomes a pain real quick.
Focusing
When it comes to focusing in a long exposure, especially in the dark we have to do a little extra work. When creating a long exposure in the dark with auto focus your camera is going to be hunting for focus in the darkness and then when you turn your light on your camera grabs focus there but part of your image will be blurry and that’s no good! To fix this problem we have a couple options. First we want to make sure our focus mode is in Single Shot Autofocus or Manual Focus. If using Single Shot Autofocus then use the Auto Focus button you have on the back of your camera with a light on your subject. Once you’ve focused then go ahead and switch your camera to Manual Focus mode so the focus doesn’t shift during the exposure. This is why we avoid Continuous Autofocus.
If using Manual Focus then we will still want a light on our subject to focus manually, if your camera has a digital zoom assist when focusing manually it will allow manual focusing MUCH easier. Once this is set you can leave your camera be, but whether you use either focus option is really up to personal preference.
Cameras
Cameras are the most frequent in the world than they ever have been ever throughout history. With cell phone cameras becoming better and better it leaves more options open for the average consumer. In this section we are going to talk about the most common types of cameras out there and what the possibilities they hold for light painting.
Film
Only until recently do we not have to use film in order to capture a moment in time. However there is something to be said for capturing anything on film. My friend Andrius does a fantastic job at capturing light paintings on film. What makes film more difficult then a current camera? With a film camera not only do you have to have specific film for an ISO level you also can’t see the image immediately after you’ve created it. These are some pretty big drawbacks when it comes to light painting but it’s also all the more exciting because you have to be REALLY good in order to get images you’re happy with on film. We also have medium and large format cameras which allow for more detail and larger prints if scanned, and of course are also larger cameras. The look and feel of film is a world of its own and many people often try and mimic film with digital cameras and post processing. Would I recommend a film camera for a beginner? Not even close, but as you become more experienced in light painting I would definitely recommend giving it a shot!
DSLR/Mirrorless
DSLR and recently Mirrorless cameras are what most professional photographers use when creating images. They use these for ease of use and the ability to use external flashes and higher post processing ability for most reasons. These shine above film for a couple reasons, the largest being able to review your images instantly and you don’t need a specific film ISO for your camera as it can be changed at will. With the invention of SD Cards you can literally store thousands of images on your camera and of course you couldn’t even come close to this with film. If you’re looking to churn out a lot of prints or images at high quality then I recommend using one of these. In most cases a DSLR or Mirrorless camera will have a larger sensor than a phone camera.
Olympus and Pentax
In the camera world there are a few cameras that have an ability called Live Composite, specifically these are Olympus and Pentax. So what does Live Composite mean for light painting? Basically you’ll set your initial exposure to a certain number of seconds depending on how bright you want your environment to be. Once that is set and you’ve exposed you’ll see the base image of what the camera picked up on the back of the camera. Then when any light is introduced it’s added as a new layer on top of your base image. What’s amazing about this is that you can view your image as it’s being created and it allows you to have less errors when created a light painting image. The biggest downside to this technology is that they are in cameras with small sensor sizes and thus printing large images or post processing is more difficult, however as a training tool it’s invaluable. Review the video below to see an Olympus camera in action and how it’s created on the back of the camera.
360 Cameras
Accessibility to consumer 360 cameras are one of the newest technologies to hit the market and they are FASCINATING. Over the past few years the technology has been steadily improving and allows for images that are only possible with 360 cameras. The biggest downside to these cameras from my own personal experience is that they have a laggy trigger to start the long exposure image so you don’t really know when it starts, which loses you precious time because the max most can do is a minute long exposure. The last detriment to 360 cameras at least with the Insta 360 One X is that I can’t edit a full resolution RAW image in Photoshop and still get the 360 effect that I want. This limits printing and post processing and is a real bummer. Great party trick though!

Assisted by Kreeeg Media
Phones And Apps
Cameras are the most frequent in the world than they ever have been ever throughout history. With cell phone cameras becoming better and better it leaves more options open for the average consumer. In this section we are going to talk about the most common types of cameras out there and what the possibilities they hold for light painting.
Thanks to the ever improving technology of phone cameras light painting is more accessible to everyone than ever. If you have a camera on a phone you can light paint, with some exceptions (Looking at you Google Pixel.) At the minimum most Android cameras can do at least 10 seconds of a long exposure by adjusting the shutter speed in the Pro/Manual mode of the phone camera and many can do 30 seconds. With iPhone no manual/Pro mode really exists for this but many apps do!
iPhone
iPhone apps that I recommend for light painting are Fotorgear and Slow Shutter. If you want to try it out I recommend Fotorgear first because the app is free, versus Slow Shutter which is not.
A quick walkthrough on how to use the Fotorgear app. First go to the app store on your iPhone and download it. Once downloaded go ahead and open it and make sure you have a tripod and phone holder because your phone can’t move during the exposure. Once you are in the camera in the app go ahead and light your subject and manually focus on them by using your finger after you’ve clicked on the focus option. Then go ahead and change your mode to Light Trail which can be done by looking to the left of the shutter button and clicking the mode option a couple times. Lastly make sure you bring your ISO down to as low as possible and all of these options can be adjusted as you craft your image. Then go ahead and start your exposure and use any kind of light you want to either light painting your subject and or expose your subject (like with a flash) to combine them together! Watch the video below to see this in action.
Android
With an Android phone native camera options vary from phone maker so instead I recommend downloading the Lightroom app and using that as your base, this is also free! Once downloaded from the Google Play Store go ahead and open it and look for the camera icon in the bottom right of the app and click it.
First make sure that you click on the little dropdown arrow to the left of the shutter button and change your mode to “Pro.” Then click on the “SS” option above the shutter button and adjust the number of seconds you want to exposure your image, my Android can only do up to 19 seconds. Then of course adjust your ISO to the amount of brightness you would like, I recommend starting low and moving up from there and after that click on the crosshair button to adjust your focus manually, otherwise it will become blurry. Go ahead and grab any light source near you and light paint! It also helps to have a tripod and cell phone holder to make cleaner images.
Camera Tools
There is a whole boatload of additional tools that make your light painting experience even better, these range in shapes, sizes and uses and really help expand on the unlimited possibilities you can do with light painting.
Tripods
I would argue that almost ANY tripod is good enough for light painting. In fact I own like 6 tripods…they somehow accumulate over time like gremlins. However it’s important to note there are some benefits to tripods that cost a chunk of change.
The weight of a tripod can be HUGE. Not only will it not get knocked over by wind but if you bump it it’s possible it won’t ruin your exposure. I would recommend a heavy tripod for a studio or a place where you don’t have to travel a lot. If you do traveling then compatibility as well as weight on the lightness side is important. Nobody likes to hike with heavy gear.
While many tripods are metal I find that a carbon fiber tripod is better not only for weight but also because in the cold it does hurt to touch it with my hands. I personally use the Peak Design Carbon Fiber tripod (Not sponsored) because it lets you obtain sharp images in 20% faster wind speeds, or using a 20% longer focal length. The camera will move 20% less when you press the shutter button, than with their metal tripod. So for me that’s a big deal.
The other important factor with tripods is whether they have a tripod mount. Many cheaper tripods you simply screw into the camera and the camera becomes mounted to the tripod itself. Many more expensive tripods like Peak Design, Manfrotto, or Benro have plates that attach to the bottom of your camera and then the tripod. The benefit to these plates is not only does it allow your camera to remove from the tripod quicker but also allows for the tripod swap technique to help you make even more insane light painting images. If you want to skip to that technique click here.
Light Sources
Flashlights
When it comes to flashlights in our present world there are A LOT OF OPTIONS. However thanks to this it also gives us a huge variety of possibilities with light painting, which is the most exciting part! Below I’m going to list some of my favorites and also link to some resources that review flashlights as well so you have more opinions than just mine. If you want to see of more potential flashlight options for light painting check out this amazing guide by Stephen Knight here.
-
Folomov 18650s
Amazing starter flashlight, if you don’t want to break the bank this is a wonderful flashlight to start with and get your feet wet.
-
960 lumens
-
Cool white (thought not perfect with a yellow tint)
-
Five brightness modes
-
strobe, SOS, beacon, moonlight,tactical modes, lock, memory and timing functions
-
Back button
-
Constant strobe
-
Waterproof up to 2 meters
-
$35
-
Can be bought from lightpainting.store
-
-
Light Painting Paradise Ryu Lightworks Flashlight
This flashlight is made for light painters by light painters, after not finding a flashlight on the markets that could meet the need of light painters decided to set out and create one of their own. While expensive (I have bought flashlights that are $80 and totally worth it) I have no doubt that this flashlight can do almost everything you could need (not sponsored.)
-
1200 lumens
-
8 Brightness Levels
-
3 strobe modes (at varying intensities)
-
Waterproof up to 2 Meters
-
Memorization mode for current settings
-
Side and Back Button
-
Single Flash Mode
-
$130
-
-
Colorshine
For a while the Colorshine was the only color flashlight on the market and in my opinion it could be A LOT better however if you’re on a budget and want a flashlight that can change colors this is definitely a winner! The picture by this image was created with said flashlight.
-
200 Lumens
-
Rainbow Mode
-
Constant Strobe but slow
-
Easy to break
-
Takes 3 AAA batteries
-
$36
-
Can be bought on amazon.com
-

-
Ants on a Melon RGB Critter
Now when it comes to color change flashlights that are built well and on top of that have a bunch of other functions for my personal taste I love the RGB Critter from Ants on a Melon. While I may be an ambassador for this brand (Sponsored?) the possibilities with this flashlight are BALLER. They have all sorts of light painting accessories like blades and whips that twist onto the flashlight which is a sick addition to the flashlight kit. The picture near this image was created with said flashlight.
-
170 lumens
-
Brightness Control
-
8 preset color modes
-
33 unique colors
-
Speed control
-
Save Custom Patterns
-
Constant Strobe
-
Sound Reactive
-
Movement Reactive
-
$110
-
Can be bought from antsonamelon.com
-

-
Light Excursion Deluxe RGB
I have not had the pleasure to use this light personally very much but I know so many light painters that speak volumes of Frank’s work and I will happily promote it. I love that fact that you can get them customized to your needs as a light painter. The biggest downside is the price but for custom work, you can’t really complain.
-
Good brightness for RGB color mixing flashlights
-
Variable strobe frequency
-
Effect mode memory
-
Momentary/temporary switch – great for light drawing or light spray painting
-
Dimmer Switch
-
Lights can be customized to user requirements
-
Choice of battery options – 18650, 9v, or 2 x 10440
-
Not a pure white however this can be used to your advantage
-
$175
-
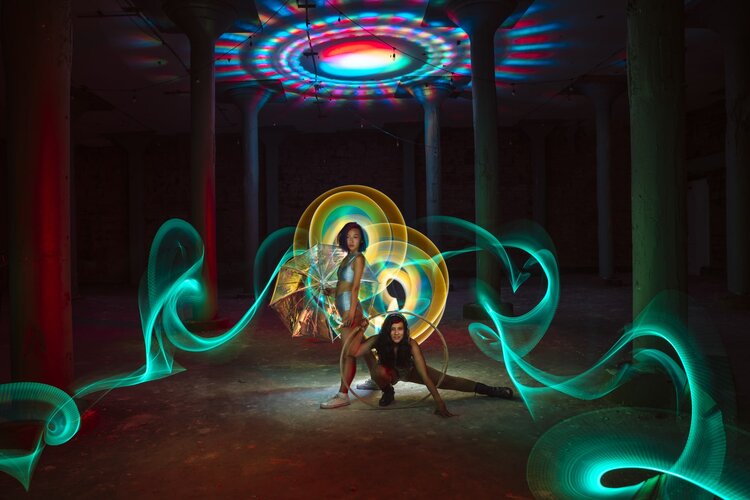
Created with Erin Simmons & Alonzo Alcaraz
Lumecube
As an ambassador with Lumecube I will most definitely talk about their lights and why I find them useful. I’m writing this review of my own personal opinion and am not paid or coerced to say anything specific. I’ll be speaking on the traditional Lumecube, the Strobe and the Panel as I’ve used all of them a decent amount.
-
Lumecube
The traditional Lumecube was the first product to come out and with Lumecube 2.0 they have definitely improved upon the original, with buttons that make more sense, and at 100% brightness can last up to 1.5 hours that’s more than enough for anything light painting related.
-
1.5 hour run time
-
Charge via USB-C
-
Has magnetic gels, barn doors, and diffusion caps
-
Multiple can be controlled
-
Can be used with a drone with proper equipment
-
Low light mode for long exposure photography
-
$90
-
-
Lumecube Strobe
So initially the Lumecube Strobe is supposed to let people and yourself know where your drone is in the night sky. You would Our does the same thing but we use it to drone light paint! Generally the placement is on the top of the drone but for uses with light painting I put it on the back near the bottom if possible for maximum vision.
-
Super light weight only 10 grams (why I prefer it over the traditional Lumecube)
-
Had red and green clip ons to change color
-
6 hour battery life
-
3m Dualock
-
Micro USB charging
-
Weatherproof
-
$40
-
-
Lumecube Panel Pro
Ok now we talking the big boys of the panel world. When Lumecube released this light they asked me to do a review on it. Now can it be used as a light painting tool? Yes 100% it has different modes that work for light painting in a pinch but it’s not my personal first go to because it is limited. However if you need colored lighting or different temperatures it’s phenomenal and I use it often when I’m filming BTS for my videos so people can see what the heck I’m doing with light painting images. It works fantastic for that purpose. Now let’s go over some features.
-
1000 Lumens
-
Bluetooth compatible
-
USB-C
-
360 adjustable RGB colors
-
5%-100% adjustability brightness
-
3000k – 5700k color temperature adjustability
-
DSLR camera mount included
-
Frosted lens with detachable diffusion
-
$199
-
Fire
Yep I mean real fire. Before we had flashlights we had to use fire at night to see and it totally works for light painting too! If you want to get into the details on how to create firesticks to do light painting with fire check it out here.
Generally when using fire I’ll use kerosene that you can pick up from any all purpose or grocery store, and then I’ll use an arc lighter as my ignition source because it can’t be blown out by wind. I’ll touch more on this topic further down.
Phone Lights
So we know that we can take a light painting picture with our phone but it can also be a light painting tool in multiple ways! Of course a majority of modern phones have a flashlight built in that works as a wonderful beginner light painting tool and one I used in the how to capture a light painting photo with an iPhone video up above. However there are apps you can download that can do a little bit more.
-
Color Flashlight
Can be downloaded from either app store and has multiple different modes that use your phone screen as the light painting tool and not the flashlight on the back of your phone camera. It’s a great app to have if you are a beginner and want to switch up your light painting game. I’ll include a video on how I used it below, links to each shop, and a list of benefits.
-
Siren mode
-
Flashing or solid colors
-
Easy on and off button on the screen
-
Free!
-
Wireless Triggers
Having a trigger of some kind, especially a wireless one is paramount when light painting. Having to run back and forth to start the camera each time is such a pain and having a wireless trigger is such a quality of life improvement. Here are a few of my favorites, that I learned about originally from Dan Roberts.
Power Sync 16-80
The king of triggers without a doubt. Super rugged and reliable have a range of 700ft, and can use multiple at once if needed. They work by clicking once to start your exposure and clicking again to end it. Another great addition is the ability to put velcro on the back of the battery compartment. I do this because if I wear a wrist brace that works with velcro I can now attach it to my body and not forget what pocket I put it in. You will need two of these and you can get a bundle from B&H Photo for around $178.
Yongnuo Triggers
If you don’t want to break the bank for a couple of triggers I understand and have another solution for you. The yongnuo triggers you can get off amazon for around $30. The downside is that their range isn’t amazing and they operate on dead man’s switch principles. I hold the button down to start the exposure and as soon as I let go it ends it. This also limits how much you can do because one hand is tied up holding the trigger down. It’s a great trigger if you are only doing tubes!
Phone App
If you don’t have access to any money and you have a smart phone you can use one of those too! Thankfully I know these are free for Canon, Sony, Nikon, and Olympus users and they aren’t terrible. They are limited on connection and the camera does need bluetooth or wi-fi capabilities to work. These work in the same way that the Power-Sync does but clicking or swiping to start your exposure and doing the same thing to end it.
The biggest downside is that it’s not as quick as the other triggers because it will load the image onto your phone for you to view, but depending on your situation could be a benefit if you can’t get to your camera. More on that below.
Light Painting Procedure for a Shoot
When shooting in a group or in just a duo, having a set procedure in light painting is super useful with clear communication and saves time in the long run making you more efficient. Here are some of my most important tips from my own experience.
1. A countdown of 3,2,1 for you, the model, and anyone else is always super helpful.
2. At the end of the countdown the word “shutter” or “open” let’s everyone know when to start their exposure and go. Then when you are finished, light painting say “shutter’ or “close” to let everyone know the shot is done.
3. If your light painting has multiple portions state what you are doing for each part just so everyone is aware. Especially when front lighting the model.
4. If working with a model they always take priority. Make sure to check on them constantly especially if outside in potentially harsh conditions.
5. If shooting with multiple people we often crowd around the same tripod space. Be respectful of everyone there and work with each other to get something everyone can be happy with.
6. If multiple light paintings are going on in a shared space communicate when you are shooting with everyone and take turns and take care to not have light spill into someone’s image.
Environment
When it comes to shooting into different environments we have two main options. Inside and Outside, these can differ slightly depending on how much ambient light there is present but these are going to be your two contenders.
Inside
When it comes to ambient light inside your largest obstacle will be how much space you have to light paint. It’s important to pay attention to how close the walls and how far your light casts. White walls will reflect more light while black absorbs. With white walls this can be countered by increasing your aperture to around 4.5-6 depending on how bright your light painting tool is. In my personal experience you don’t need flash to light your subject unless you are going for a specific look, otherwise the ambient will light them just fine.
When it comes to clothing and how close you are taking your image (and this applies to all environments) make sure your subject doesn’t blend into the background. For example if they are wearing black and you have a black background you’ll need to be intentional on how you light your subject so they stand out from the background.
Outside
Blue Hour
When shooting outside you will substantially need to change your shooting style versus inside or in a studio. Depending on the time of day in this case blue hour you’ll want to make sure you have a bright flashlight and shoot at a higher f stop. With these things in mind it’s also important to remember your light paintings will need to be quick 1-3 seconds will generally be the best in this scenario. As the blue hour diminishes you’ll adjust your settings to have a dimmer flashlight, a lower aperture and potentially boost your ISO.
Milky Way / No Light Pollution
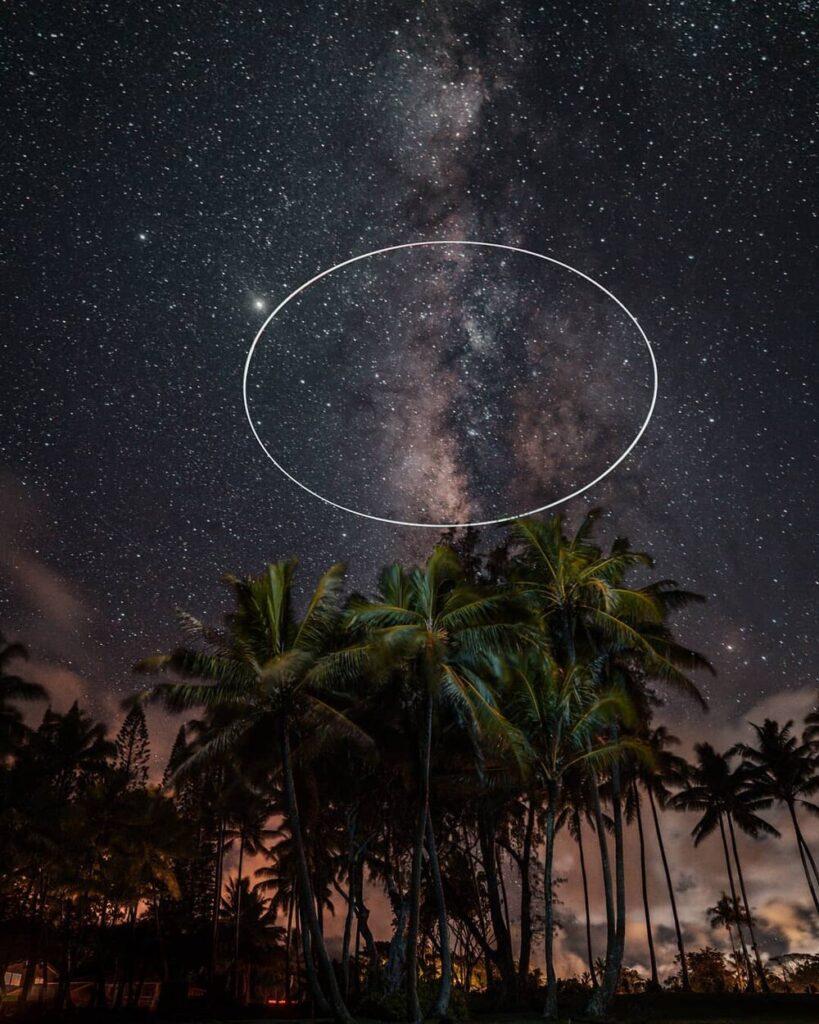
When dealing with the Milky Way and no light pollution this first thing you’ll want to do is exposure for your environment. We do this because while a light painting is cool if you can’t see the environment you might as well have done the light painting in a dark room and there wasn’t a point in going outside. When light painting with the Milky Way (at least with tubes) you’ll want to have a flashlight that can have a low power 50-100 lumens, and boost your ISO to 3200 or 6400. We boost our ISO that high because it allows use to capture the Milky Way as much as possible while keeping grain minimal. It’s also important to have a camera lens that can have an aperture of 2.8 or lower. Of course you don’t have to do light painting and Milky Way in the same shot but it’s more rewarding and makes you a better light painter at the end of the day.
City Lights / Ambient
When doing light painting in the city you are without question going to run into ambient light creeping into your frame. Similar to how you deal with blue hour you can increase your f-stop and power of your flashlight to allow you to have a better exposure. Another option is to use a camera with Live composite, and then all other factors don’t really matter as much anymore.
How To Light Your Subject
In this section I will mostly be talking about how to light your subject in respect of that subject being a person. You can use these techniques for other things but this is what I have the most experience in. We will be going over the techniques that I’m aware of which include: Ambient, Continuous, Flash/Strobe and Light Painting Brushes Portrait Light.
Ambient
When light painting with ambient light, it can come from two sources. Your light painting tool and your environment. When it’s coming from your light painting tool it’s important that not only the model doesn’t move when the light is hitting them but also if you’re outside with other ambient light from city lights then it acts more as a continuous light and your model has to do even better to not move during that time period. Below are two pictures created with ambient light from just light painting tools, and well as ambient light from city lights.

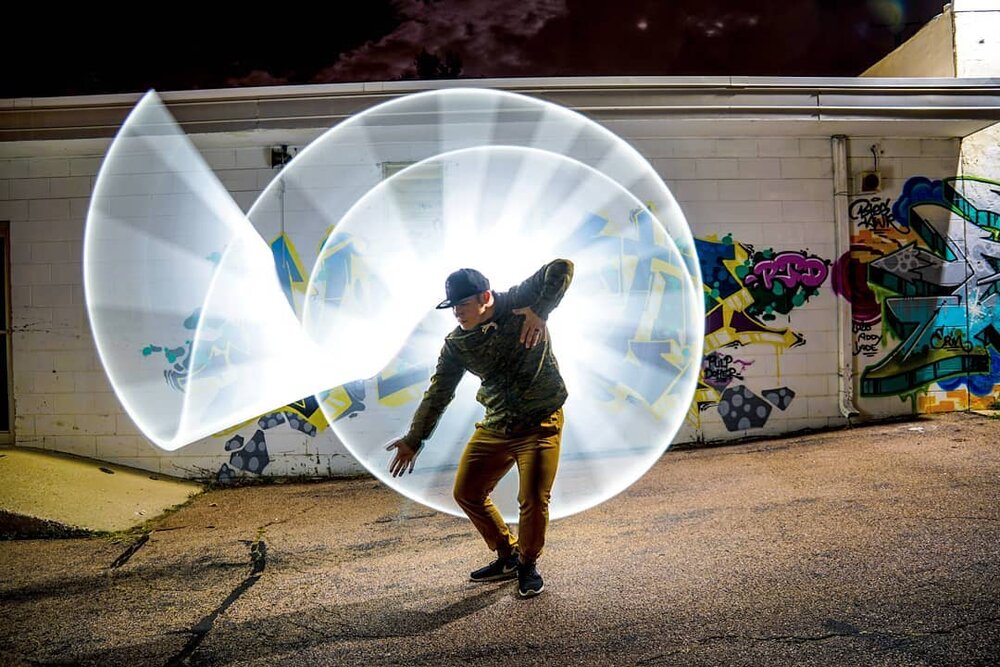
Continuous Light
When using continuous light your image will grow brighter over time if the light is kept on, and if your model moves then they may become blurry. If you own continuous lights you can treat them as a flash of sorts by turning them on and off quickly but the speed of a flash can’t be matched. In the image beside you’ll see when when a continuous light was used and how the model looks blurry regardless of how still she was.
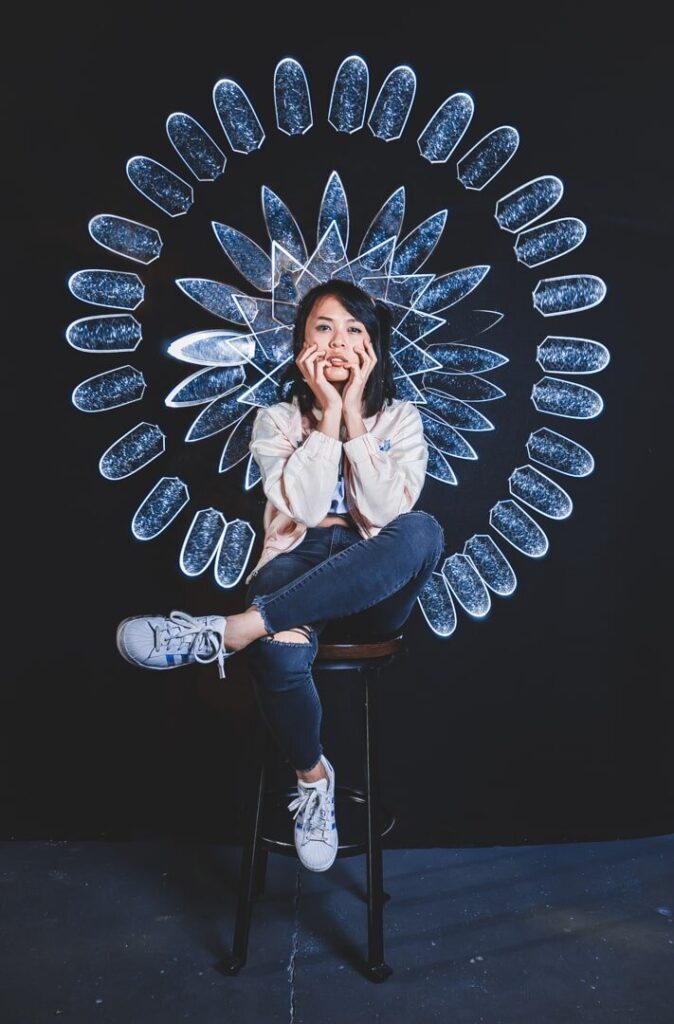
Flash/Strobe
When you use flash or strobe (as they are the same thing basically) you’ll be hitting your subject with a flash of light before or after you light paint. I’ve found in my own experience that using front curtain sync (before) instead of rear curtain sync (after) tends to work better in most cases. Of course there are exceptions to the rule which you can read more about here.
To get the most even lighting with a smaller chance of your model moving I recommend flash, if using modifiers to shape your strobe or flash light minimal spill can be achieved. A flash example of the previous image will be beside so you can see the difference.
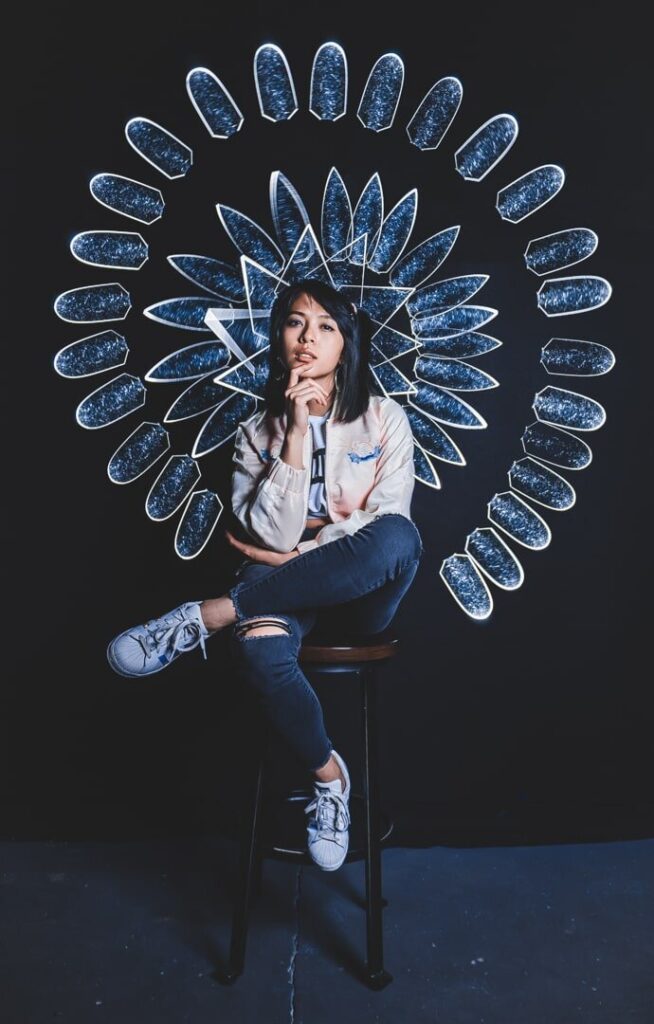
Light Painting Brushes Portrait Light
This portrait light can make some amazing photos. What’s unique about it as a light painting tool is that is truly allows you to sculpt the light in your photo with only that light source. When using this portrait light you’ll need a universal connector as well as a flashlight. The light this provides is a flat light so it’s not as quickly dynamic as a bunch of strobes would be but you only need this one light to light your subject. Beside is an example in how I used a fiber optic whip and a portrait light together to create a stunning image.
And of course if you want to see all of these in action and see the detriments and benefits watch the video below!
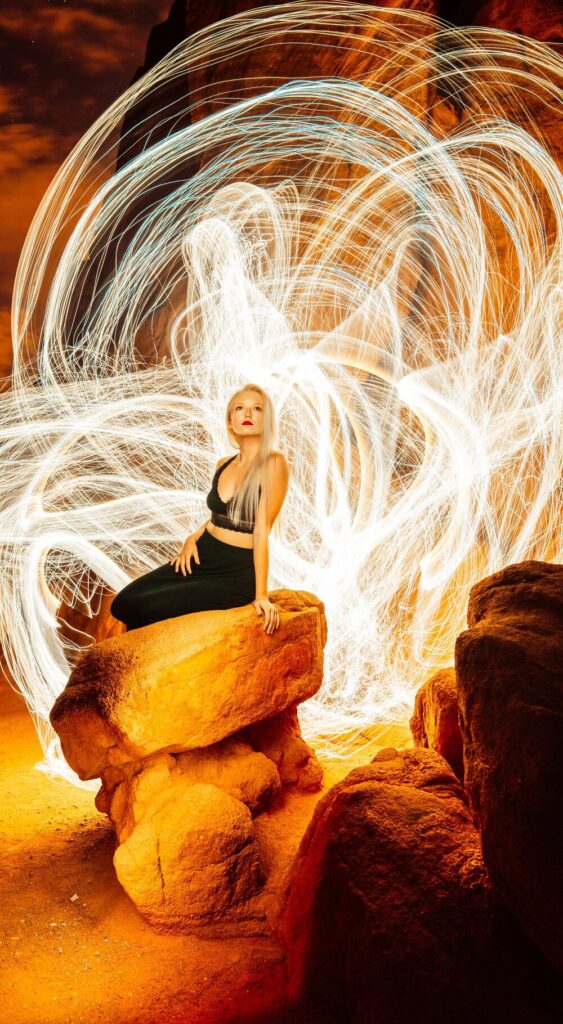
Light Painting Styles
Now we’ve covered A LOT of the technical basic stuff we can get into the fun visualize showy side of light painting! There are so many different styles and I’m going to do my best to cover as many that I’m familiar with even though I’m not an expert in all of them.
Portraits
Tubes
First up and most popular when it comes to light painting portraits we have the tubes! Made popular by Eric Pare not only are they easy to use, they are cheap to make and an easy tool. Eric’s work is what originally inspired me to get into light painting and I’ve been obsessed ever since.
-
How to make your own light painting tubes
It’s really easy to make your own light painting tubes. If you prefer a video you can view that below this text.
What is a light painting tube? The base material is a fluorescent safety tube. Most of us are familiar with fluorescent lights, these tubes are intended to go around a fluorescent light in case it breaks to capture the broken glass in it’s plastic frame. You can buy these at your local home improvement store, I personally use Home Depot or Lowes but you can definitely find these anywhere in America. These tubes run for around $4 a piece and are 4ft long.
There are two different sizes of tubes. (I’m discounting the 8ft long version because the majority of us don’t use them.) We have the T8 and the T12. This size difference is in their girth not their length. In a T12 tube you can fit two flashlights that would traditionally fit inside a T8 tube. The community at large now uses T8 tubes more than anything else but either tube is viable.
The second material you’ll need is wax or baking paper. With a 3in 4ft portion of this inserted into the tube it will give your light a nice diffusion when combined with a flashlight. If you don’t have the paper in there your tube will look very transparent and for the most part we are trying to avoid that. If you don’t want to use baking paper you can instead scratch the tube up with sandpaper, but I personally haven’t been successful with that. With these two things you have your very own white tube!
What if we want to change the color? Our first option is gels. You can either buy your own rolls of Rosco gels which run about $80 for a super long roll or you can buy gels made for tubes from lightpainting.store. This is what I personally do unless you can score a win on eBay.

The other option we have for colored light painting tubes is using holographic paper and a couple other avenues. You can pick up holographic paper at your local crafts store, I personally use Hobby Lobby or Joanns. When using the holographic paper make sure to cut it so that it only takes ¾ of the tube space up. If it wraps around the entire tube then it will block the light from the flashlight hitting off the holographic paper and it won’t look good in camera. Pretty much anything shiny will work thanks to Zach Alan he used rainbow spandex to make some amazing images. Here is a tutorial on how to create that effect.


Now that we know how to build tubes we need to talk about the shapes you can make with them. Below I’ll be including a series of images as well as a quick video on how to make some of these shapes with a tube. It’s much easier to show than explain when it comes to this.
Light Painting Blades
Coming straight from lightpaintingbrushes.com (LPB) we have acrylic blades. After my deep dive into tubes I started to want to blades and see the possibilities that they hold. I personally always buy these from LPB because I don’t know how to make them myself but I know it’s possible. Just make sure you wear proper protection because you don’t want to breathe in acrylic. Let’s move onto what you can do with these light painting blades.
Crowns
As of the writing if this guide I’ve been obsessed that past several months on pushing light painting crowns to the max. In my own personal experience I only ever did it one way with a flashlight on strobe. Thanks to Jason Page however I’ve started to turn the flashlight on and off manually and it gives so many more ideas! In order to use any of these blades from LPB you will need a universal connector. We are now going to break down a few of these ideas to give you grasp on how these work.
Our basic setup is applied to all these crowns. Camera, tripod, remote trigger (recommended) and flash.
Jason Page Crown
really only started playing with different crown ideas after I met Jason at ImagingUSA in 2020 so this is why I credit this basic crown concept to him. This time instead of having strobing flashlight you are going to be turning the flashlight on and off manually. Start with the blade behind your subjects back and move it around turning on and off at your leisure.
Light Painting Headdress
The idea for a light painting headdress came to me on a whim one night while Iwas at Eddy Sound with my friend Rachel. It’s an expanding crown that works in layers, and builds on the Jason Page technique. First take 3 blades of your choice and determine in what order you want to use them, or you can use the same blade but I think it looks better with 3 different ones. I like to keep the other blades close at hand or in my pockets if they fit. Then we can start like the rest of the crowns. Start with the blade pointed down behind your subjects head and turn it on and off until you’ve completed your rotation. Then switch blades and start a little lower behind your subject’s head. I like to keep my arm only partially extended for this and make a circle around my subject. Then we do the last layer with the last blade and I keep my arm full extended on this one and start even lower. This can take up to a minute so make sure you have a remote trigger to make it longer than the standard 30 seconds on most DSLR’s or someone to hold the Bulb button down. Watch the video below to see this in action.
Rotation Strobe Crown
I could talk about crowns all day and I have at least 10 more of these but I don’t want this whole guide to be about crowns! This can just be enough to spark your creativity. This crown is much simpler than the Drag Crown or Headdress if those are giving you some trouble. The Rotation Strobe crown is simple. Start behind your subjects head with the blade pointed down then with the strobe function on rotate the blade not only behind the head but also like a drill of sorts. You can do this as many times as you like. Watch the video below to get a handle on what I mean.
Wings
Wings are an entirely different animal than crowns. With crowns you mostly stay in one spot behind your subject. In at least two of the three wings I’ll be sharing today you’ll be moving to both sides of your subject, walking around to make these wings possible. I recommend the Feather Blade from LPB but it’s up to you!
Basic Wings
I always recommend starting with basic wings because everything after this will take some practice. Grab your feather blade and hold it behind your subjects back, the blade can be up or down, your preference. Then while starting around the shoulder blades turn the flashlight on strobe and move it to either side of your subject and bring it back to the center of their back. Move the blade a small distance down their back and repeat the process. I generally do a set of three or 4 and call it good. I’ll leave a picture below so you can see what I’m talking about.

Angel Wings
Light painting angel wings is a little more complicated because you have to turn your hand as you make the shape. Start from the the middle of the shoulder blades with yoru blade sideways towards the left or right, whichever side you want to start with. Now imagine the shape of an angel wing in your mind and trace that shape with your flashlight on strobe.I start with the highest most wing first and while counting my steps out I count them back while going in reverse what I just did with my hand .Then I repeat this process but starting a little lower down the back and taking fewer steps out. Then you do the same on the other side!

Plume Wings
Light painting angel wings is a little more complicated because you have to turn your hand as you make the shape. Start from the the middle of the shoulder blades with your blade sideways towards the left or right, whichever side you want to start with. Now imagine the shape of an angel wing in your mind and trace that shape with your flashlight on strobe. I start with the highest most wing first and while counting my steps out I count them back while going in reverse what I just did with my hand .Then I repeat this process but starting a little lower down the back and taking fewer steps out. Then you do the same on the other side!

I also have a video for light painting wings as I believe that seeing is so much easier than reading when it comes to light painting.
Abstract
Of course when it comes to light painting anything goes and you can just go wild using blades however you see fit! When I do this with models I often just go free form and create flowy shapes with blades around my subject. You really can’t go wrong in this manner, and if you don’t want to have a subject you don’t have to! There are so many light painters who do blade kata and just create awesome abstract art!
Fiber Optics
When it comes to light painting with fiber optics there are still so many uses that I don’t know of and am continuing to learn. We are going to go over a few of those uses and see just how versatile fiber optics can really be for light painting.
Face Outlining
I don’t know if there is an official term on using fiber optics with peoples faces but it can be INCREDIBLY powerful if used in the right way. Not only is it simple to do but you can get some wonderful effects. Whether you use black, white, or colored fiber optics is up to you but for face outlining I recommend black fiber optics. This is because only the tips of the fiber optics will show color. This is great because it won’t blow our subject’s face when we are stroking the fiber optics down or up the face and will only illuminate it. From my own experience I find going up the face is better, and helps eyes not twitch.
If you would like to change the color you can either use a color change flashlight. Shrinky Dinks that you cut out tracing the large size of a universal connector, bake, and then color (Thanks Kirk Edwards), or put gels on the inside or on the tips of the fiber optics.


Fiber Optic Crown
While I haven’t explored fiber optics in the use of crowns very much they certainly have potential! For the cloud crown you simply start at the back of your subject head with the end of the fiber optics pointing towards the camera. Then you make circles around their head getting bigger and bigger if you want to do layers. While making the crown feel free to shake the fiber optics as much or as little as you like!

EL Wire
Fire

Steel Wool

LED Hoops
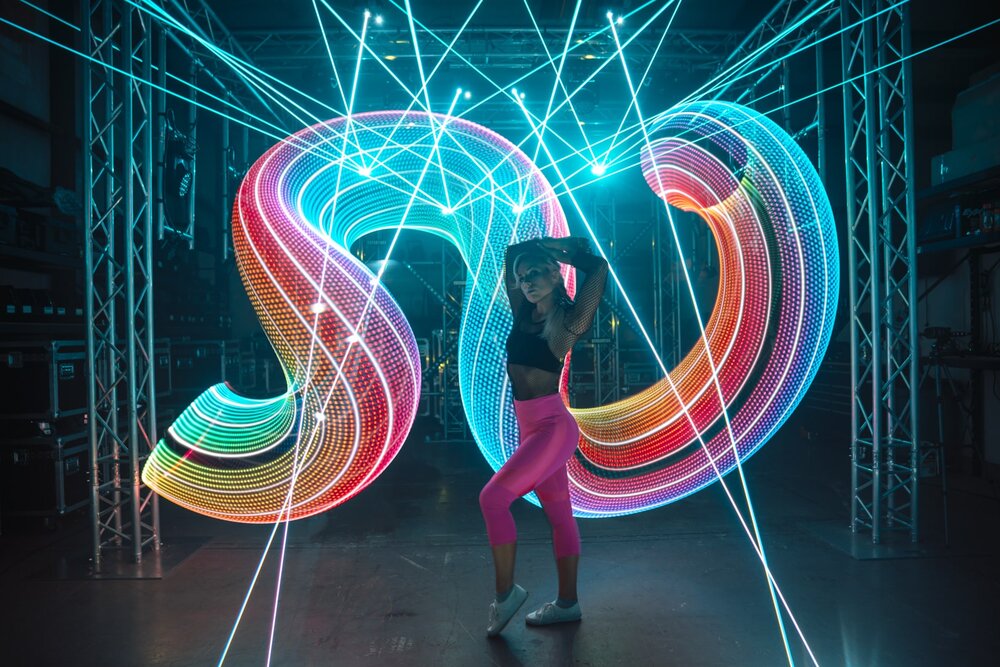
Fairy Lights

Magilight/Pixelstick

Iridescent Makeup Bag

LED's

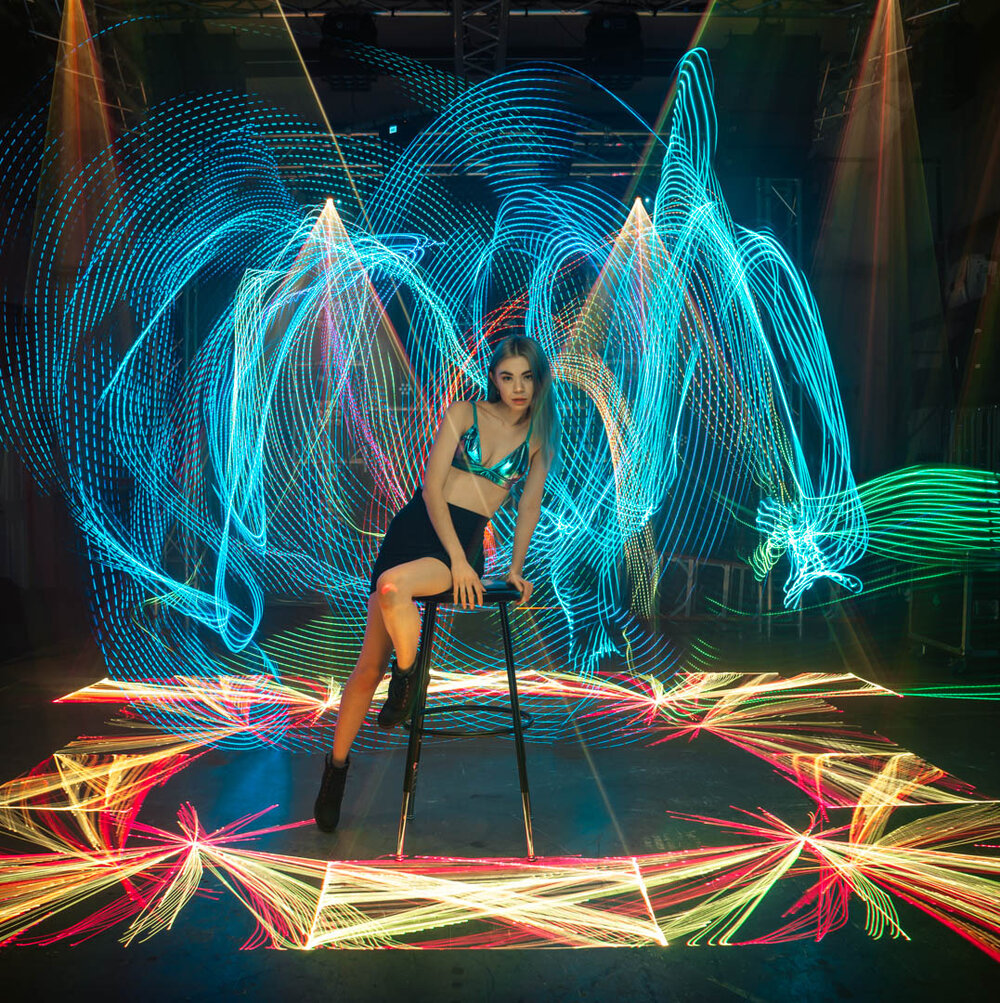
Yongnuo YN 360

Combining Tools

For the time being this is my exhaustive list of different light painting tools to use for portraits. I’m sure there are more out there but I haven’t use them yet. It’s also very possible I’ve forgotten some, but as a guide I think this will do well. We are going to move onto other styles that are not necessarily portrait related but can’t stand well on their own.
Spirographs
Light painting spirographs is a great beginner project when diving into the world of long exposure and equally you can get some fantastic results. If you’ve ever seen the land sand design pendulum items at a yoga studio you’ll know what I’m talking about. The items you’ll need are a small light (you can find a keychain flashlight at the dollar store), some rope and a way to hang said light with rope from the ceiling or close to it. Make sure you also have a decent amount of space around where you are hanging the light.
With that setup set your camera below where the light hangs naturally so your shot will be center. You can set your exposure time for whatever you want but I recommend the longer the better. It’s also very helpful to have an Olympus that is tethered to a monitor so you can see what’s being created.
Once you’re ready turn the lights and swing your light, then start your exposure. It’s recommended in this order because we don’t want a strange trail from the initial throw in our shot
Light Writing
With almost any light you can do light writing! It doesn’t have to be complicated and that’s the beauty of it. While light writing is accessible there are a couple tricks to pull if off successfully that you should be aware about. First you must be aware that whatever you write towards the camera will be BACKWARDS if you write normally. So when you are light writing you guessed it you’re going to have to write backwards to make it look right in camera. Of course you could flip the image in post but where is the fun in that? To avoid this you could write with your back towards just make sure your body doesn’t block the light getting to the camera.
The other factor you need to be aware of is that unless you are writing in cursive (not that Gen Z would know what that is) you’ll need to turn off the light between each letter otherwise there will be a trail.

Created by and with permission from @massstreetart
Light Calligraphy
While I may personally be a novice when it comes to light calligraphy there are many amazing light painters who excel at it. Light calligraphy is inspired by Arabic calligraphy with it’s gorgeous swooping forms. In many example you’ll see a small line of lights to create this shape. This is a tool made specifically for calligraphy., and in my opinion creates such a wonderful effect.

Created by and with permission from Jason Page
Orbs
One of the most popular and easiest thing to create with light painting are orbs! Different tools may be used when creating these and pretty much anything goes, the technique is generally the same.
Start facing the camera and turn away at 90 degrees either to your left or right. Point your tool down put it on strobe (or not up to you) and move it up and down. Then move your feet a little towards the opposite side in the direction of the camera and repeat the process. Even though we are creating a 3D object we only need to move 180 degrees and not 360. I know this sounds strange but it doesn’t add anything of note.
Another way to make an orb is with tools specifically for those. It’s essentially a rope that has a ball with lights attached to it, and you swing this around while making a circle with your body. Denis Smith does a wonderful job of this and I HIGHLY recommend you check out his work

Created and with permission by Denis Smith
Environmental
We have talked A LOT about using tools and creating a light shape out of it but very little about lighting up the environment with your light! Often it helps to have very powerful flashlights to light up great swaths of the environment but you don’t have to. If you just want to light painting a tree with a few different colors in your environment that’s more than good enough. In the example below myself and a bunch of other light painters swung light around ourselves to light up the terrain while a drone took a picture from above. The sky’s the limit!

Created by Dan Roberts, Zach Allan, Margarita Rubiera, Andrius Sprindys, Derek Lawerence, Gunnar Heilmann, Reagan Roberts and myself.
Drones
Most people use drones to catch amazing footage from the air but as light painters we are definitely going to use drones in ways they weren’t intentionally designed for. Specifically we are going to focus mostly on DJI drones in this section but most drones have at least some capability for drone light painting. The person who originally inspired me was Phil Fisher.
Drones Lights
Before we get to how to light paint with drones we need to talk about the kind of lights to use! Personally I use Lumecubes and have since I started this art style, but honestly any light source that isn’t heavy such as a headlamp will work as well. If you happen to have a Mavic 2 Pro with a light built in underneath (also known as the landing light) you can use this for some drone light paintings, but not all. I’ll dive deeper into this later in the drone section. When it comes to Lumecubes if using the Mavic Pro 1 You can gaff tape a Lumecube to the back of the drone or depending on the drone if drone mounts are available for that model from Lumecube you can attach a Lumecube to either side. This is useful to not only create a light painting but also illuminate the environment at the same time.
The other light that I use most often is the Lumecube strobe. What I love about this little light is it’s lightweight at 10 grams is half as bright as a Lumecube on full power and lasts for 6 hours. When it comes to light painting images in the sky, this little guy is perfect. Lastly, if you’re looking for an easy way to change colors and turn the lights on and off while I haven’t used them yet the PGYTECH DJI Propeller Guard allows just this, and is still lighter than a Lumecube.
Orbits
Now for the most simple way to make a drone light painting is by using the orbit function that comes in most if not all professional drones. This is fantastic for creating a sense of interest around a specific point and illuminating the landscape at night. In the dark a drone normally will find a spot of interest to circular around by using it’s camera. Having two Lumecubes on a drone one for the circle light painting and the other for the environment helps make this happen.
If you are using a Mavic Pro 2 a great solution while using the landing light is to get a small cap like a laundry detergent cap (if it’s transparent) and stick it underneath the light. This will allow you a similar effect of a light pointed towards the camera without a Lumecube or other added weight, however landing and takeoff may be more difficult, so use with caution.
Horizontal & Vertical Drone Light Paintings


Stop Motion Drone Light Paintings
We’ve created vertical and horizontal light paintings. Now let’s add some movement!

Find a GIF of your choice or create an animation yourself and determine how many frames you want it to be. I used the famous horse animation because it was iconic and only 10 frames needed to make it continuous. Determine where you want to fly in Google Earth Pro and then create an image overlay for each frame and place them in the exact same spot as best you can. Make separate folders for each image and then trace each image like we did before for horizontal images. Export these as a KML, upload to Litchi export as a CSV, upload to the vertical transformation tool, and export one more time as a CSV. Finally do our final upload to Litchi and save each mission sequentially to how animation will flow. Now go out and fly it to capture all the images!
The last and final stretch for this will be putting all the images together. Personally I use the Photoshop Video Timeline for this. If you don’t see this click on Window -> Timeline. Import the first image of your series as a layer. Then within the video timeline to the left hand side you’ll see a little film strip. Click on the down arrow next to it and click Add Media. Grab all files there excluding the first one and click Open. You now have a bunch of new layers, one for each picture.
In the bottom left of the screen there are 3 squares , click that and your timeline will change. Click the first image in the timeline, hold shift, and scroll all the way to the right and click on the last image. Click on the down arrow underneath an image on the timeline that is next to the number of seconds. Change that to No delay or .1 seconds. Then go to file export, and render video.
3D Rotational Drone Light Paintings
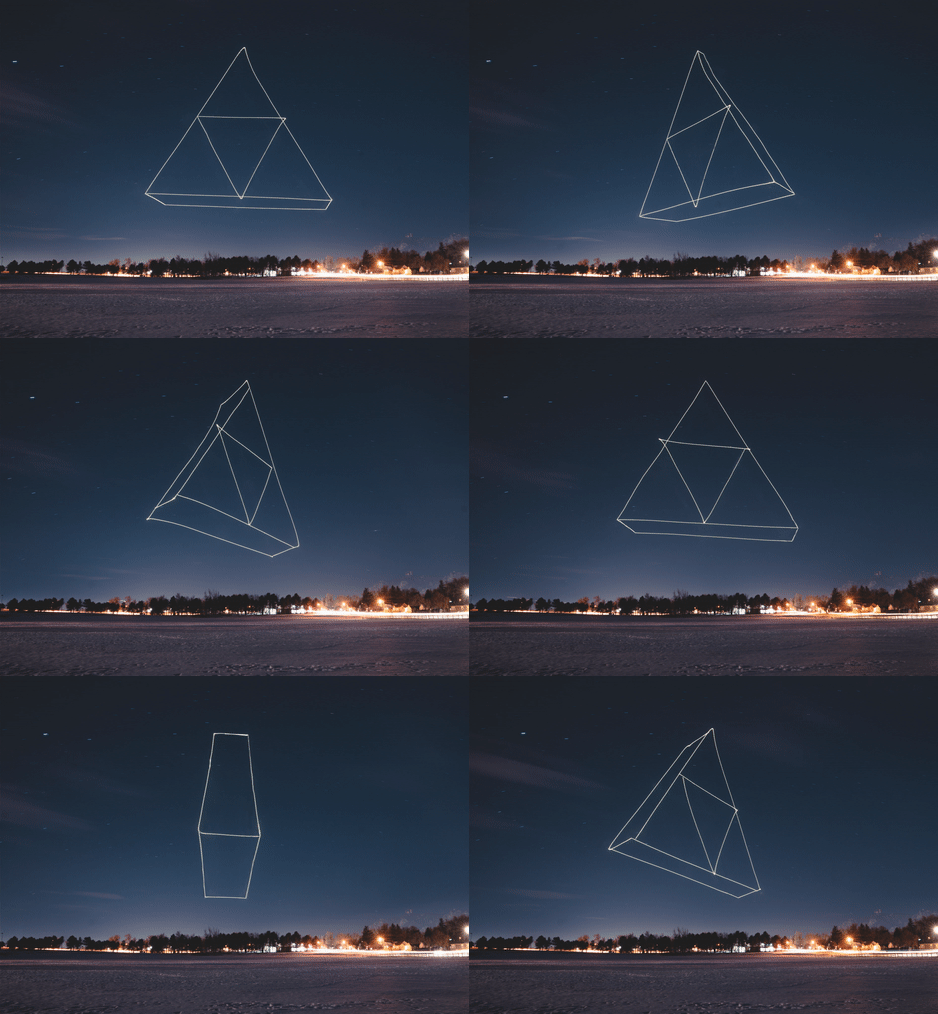
To make a 3D image is a little more difficult than a vertical image but not by too much. We will use an image of the Triforce for example. First created the Triforce horizontal on Google Earth Pro, and convert it to vertical using the tool. Once you have a vertical version, save it within Litchi and then change the latitude of all points by around .000030 or so. If you are doing the front side first then subtract this amount. This will move all points a little bit backwards. Go ahead and save this shape. Now we just need to connect the lines between each shape you created both front and back! Determine where you want your lines to connect (for us it’s each point of the triangle) and download each of the front and backward shapes as CSV’s. Once you’ve done this you can copy the latitude and longitude easily between the two shapes where you want to make the lines and if under 99 waypoints can combine all of them into one mission.
We now have our first 3D light painting image. However when shot straight on it will be underwhelming (and you might have some extra lines in there because well we can’t really tell it’s 3D from straight on). At this point it’s really just a vertical light painting BUT we have a solution, before that though we need to find the exact center of this shape, for a perfect rotation. What you’re going to do is copy the code that I paste below here and go to codepen.io and create an account. Then on the left hand side under ‘Create” you are going to click on ‘Pen.” Now put the code on the column labeled JS or Javascript.
/**
Open a program like CodePen (online) and run this script to find center
*/
var data = [
[45.849382, 76.322333],
[45.843543, 75.324143],
[45.765744, 76.543223],
[45.784234, 74.542335]
];
var newData = GetCenterFromDegrees(data);
function GetCenterFromDegrees(data)
{
if (!(data.length > 0)){
return false;
}
var num_coords = data.length;
var X = 0.0;
var Y = 0.0;
var Z = 0.0;
for(i = 0; i < data.length; i++){
var lat = data[i][0] * Math.PI / 180;
var lon = data[i][1] * Math.PI / 180;
var a = Math.cos(lat) * Math.cos(lon);
var b = Math.cos(lat) * Math.sin(lon);
var c = Math.sin(lat);
X += a;
Y += b;
Z += c;
}
X /= num_coords;
Y /= num_coords;
Z /= num_coords;
var lon = Math.atan2(Y, X);
var hyp = Math.sqrt(X * X + Y * Y);
var lat = Math.atan2(Z, hyp);
var newX = (lat * 180 / Math.PI);
var newY = (lon * 180 / Math.PI);
return new Array(newX, newY);
}
console.log(newData);
If you look at this code the most important thing for you to see is the var data, and there 4 sets of latitude and longitude data. In my example we are using the Triforce so I took the bottom of the shape and added each latitude and longitude to the var data and then ran the script and it gave me the center of the shape.
Now that we have the center of the shape we can run this script. (Thanks Allan Austria for this!) Before we run it make sure to find the code that says:
orig_lat_cntr = ########
orig_lon_cntr = ########
(# is in place of whatever numbers are there already)
Change these numbers to the new center you just calculated. Then upload your CSV that has all combined paths to the 3D Rotation External Litchi Transformation Tool. Once uploaded enter your desired minimum altitude, then click enter to use original for inclination angle. With the CW rotation angle if we are starting from 0 and you want a 45 degree change put in 45 here to change the angle at which the shape will be shown. Do this subsequently for every 45 degrees to get a full rotation. Keep in mind you only need 7 rotations and not 8 because it will just start over at the beginning. Once created it will automatically download and you can repeat this process. Then upload and save to Litchi and go fly!
Using the instructions from the stop motion light painting section previously you apply this same process to create a 3D rotation.
You have now created your 3D Rotation drone light painting! Congrats!
Video Drone Light Paintings

Did you know you can create awesome videos of your light paintings too? When out in the field try to go as close to blue hour as possible. Then change your camera settings to video mode and select a shutter speed of around 1/50 – 1/80 I’ve found this works best, though you could go higher if it’s still too bright. Use your best judgement here and we are competing with the sun. Change your f-stop to probably around 5.6 or higher depending on your available light as long as you can see the drone light. Once you have your recording pull it up on the computer and download a program called KDENLIVE. It’s free! If you have Premiere Pro you can do this with the Echo Effect but I find KDENLIVE better and much faster. You can download KDENLIVE here but make sure you download 20.04.1 or earlier as the newer version don’t have the light graffiti effect.
Once KDENLIVE is open double click on the box underneath Project Bin and input your video file. Then take your video file and drag it to the timeline. Right above the timeline is a little tab labeled ‘Effects’ click that. Now click on the video on your timeline to highlight it, then near the render button you should see a row of buttons that includes a film strip near the top of your screen. Click on the film strip. Now click on ‘Misc’ and then drag Light Graffiti onto your video on the timeline.
Play through the entire clip not only to watch it but to install the effect on the video. If you don’t it won’t export correctly. To export click on Render and change the format to mp4 and you have your video drone light painting!
Automotive
When it comes to light painting cars or any other vehicle it’s generally done with multiple light paintings combined into one in post. I most often have used a Yongnuo YN 360 attached to a stick to help me get some overhead lighting but almost any light will do! The process is fairly simple. Start your exposure with your camera on a tripod and get a base image, if you expose for a few seconds and it’s pretty dark that’s fine, you’ll need this later. End your photo. Now expose again and shine the light over the car in one pass doing your best to keep the distance between the light and car the same for even exposure. End your exposure. Repeat this process for multiple parts of the car until you are satisfied you have enough images for you to play with later.
Open Lightroom and set Enable Profile Corrections and Fix Chromatic Aberrations on all photos you want to use. Then highlight those photos, right click, and choose “Open as Layers in Photoshop.” With all the layers in Photoshop open highlight all of them and choose Lighten for all but the base image. With your base image at the bottom you can now see all the lights streaks, mine it like that below.

Now you’ll create a mask by first highlighting the top most layer and then click the white rectangle with black circle in the bottom right of Photoshop. Then choose the Brush tool or click the ‘b’ button. Make sure that the white mask box is selected and on the left hand side you’ll see black and white squares. If you click on these they will switch. With the brush tool just remember black reveals and white conceals. Now you can brush away the light streak in your car light painting image and get a clean picture.

I’m so excited to see what you can make with some basic techniques (I know I put all the drone stuff in the same spot but that made more sense to me even if a lot is advanced.) In the next section we will be going over intermediate and advanced techniques.
Intermediate and Advanced Light Painting Techniques
Top Down

Double Exposure

Tripod Swap/Lens Swap

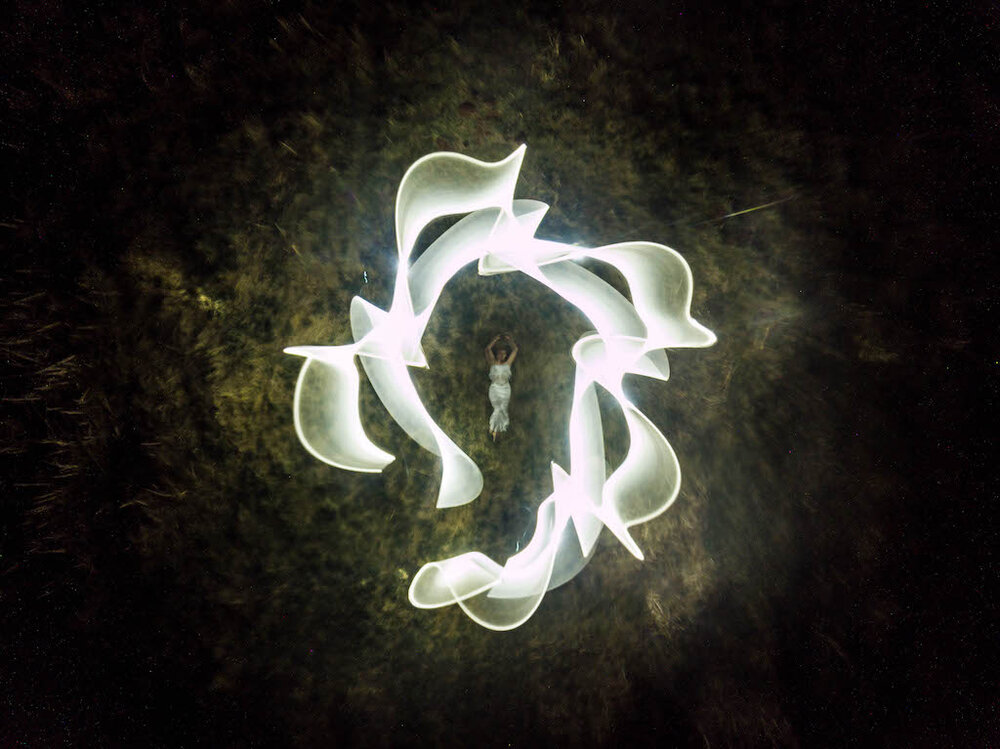
What if I told you the above picture was created 100% in camera? Oftentimes a tripod swap and a lens swap will go hand in hand, like in the above picture. One of the biggest reasons for this is because of the focus for each lens subject. I’ll explain this and the process using the picture above. To start I laid down some black fabric over some chairs and had my roommate pose. I did my long exposure and lit her by hand. I’m exposing with a 24-70 lens with my camera on a tripod at this point. Then while in the dark and the camera still exposing we take the camera off the tripod and change the lens to the 12mm in the dark. Then with the lens cap on the 12mm I turned on the lights and went to the dryer and lit the outside of it with a purple flashlight after putting my camera on a different tripod that was setup beforehand.
Many people argue that you could do this in Photoshop and of course you can! This in my opinion defeats the joy of creating something in camera and pushing your understanding of photography and light in ways most people never experience.
Camera Rotation

Created by and with permission from Dan Roberts
Shutter Drag

Prisms

Teleidoscope
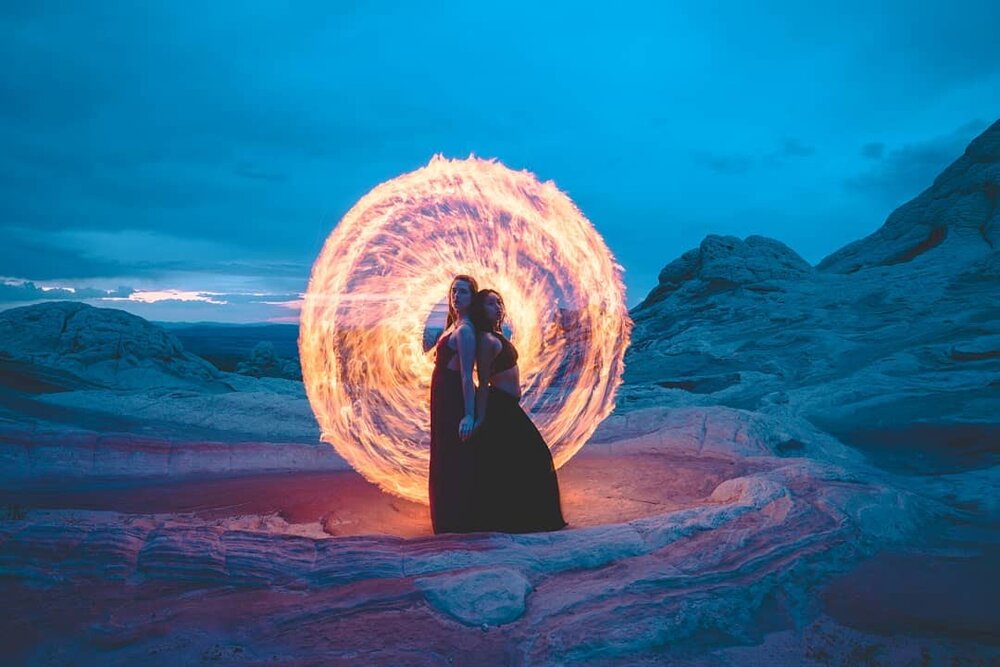
These are also known as tapered kaleidoscopes. As you can see in the image the smaller part of the teleidoscope goes around the camera lens and expands bigger away from the lens. When making these it’s important to use 1st surface glass for the best reflections which you can get out of old TV’s for pretty cheap. Downside is that once the glass is cut it will only work for that specific lens size so choose wisely! Below is an example of the original shot and a remixed teleidoscope shot.
Light painted by Zach Alan

Captured by and with permission from Dan Roberts painted by Zach Alan
Holograms/Kaleidoscope
Holograms are similar to teleidoscopes except that are the reverse! Now the biggest side goes around the lens and the smallest side if furthest away. These can be massive depending on how big or small the small hole is. You still want to make these with 1st surface glass to get beautiful reflections but our main focus will be creating fun patterns with light from the small hole that bounce around the mirror and into the camera. Beside is an example by @fdu4 on instagram.
If you want to make your own make sure to check out these instructions by the incredible Johnny Griffin.
Sheet Technique
This technique as far as I know was created by Jason Rinehart. The basic idea is to hang a sheet or a backdrop from either the ceiling or if you have some stands built from backdrops. Then while using the sheet as a canvas you wave lights behind it without a person and use the transparency of the sheet to your advantage. Here is an example beside.

Brocade Technique

Long Exposure + Movement

Lasers
I’ve only recently begun to use lasers in much of my light painting work thanks to Eddy Sound inviting me to their lighting lab. Some quick laser safety points are that don’t let your camera lens or your phone pass through a laser as it will damage the sensor. This also applies to your eyes which are far more valuable.
Most of the time I use lasers as an extra aesthetic and don’t light paint with them per say because they are fixed on a structure. I find they add an extra spark so a picture that wouldn’t be as cool otherwise. There is an item called a LaserCube that allows for a lot of creative ventures and could be super useful with light painting, such as outlining environments or subjects. A good example of this is @juanthelightpainter on Instagram.

Stencils
Stencils are fascinating when it comes to using them with light painting as they open so many possibilities I didn’t know could happen. With the Magilight that we discussed earlier you can create wings pretty easily. You can do this with stencils as well but it allows for much larger than life images than a Magilight could create. I’m going to explain the two ways to use stencils, and it’s a lot but I believe in you!
The first way to use stencils is to have a frame on a tripod that holds that stencil. While this holds the stencil you set up a second tripod with your camera on it and adjust your focus for the stencil. Once you have that then you’ll set up a second tripod for the rest of your shot and focus on your subject but with a different lens because you won’t be able to check focus while the image is being taken.
Now that we have those set we’ll turn off the lights and start our exposure. We’ll start with the stencil and light it with our camera on the first tripod and lens again. Then once that’s finished in the dark we will remove the first lens and apply the second lens. Once these have been switched if the lens cap on the second lens is on you can turn the lights on temporarily to move your camera to the second tripod. Once your camera is on the second tripod with the new lens then you’ll want to turn the lights off again and remove the lens cap. You’ll expose your subject and combine your images!
You can change the size of the stencil depending on how close you have it in relation to the camera.
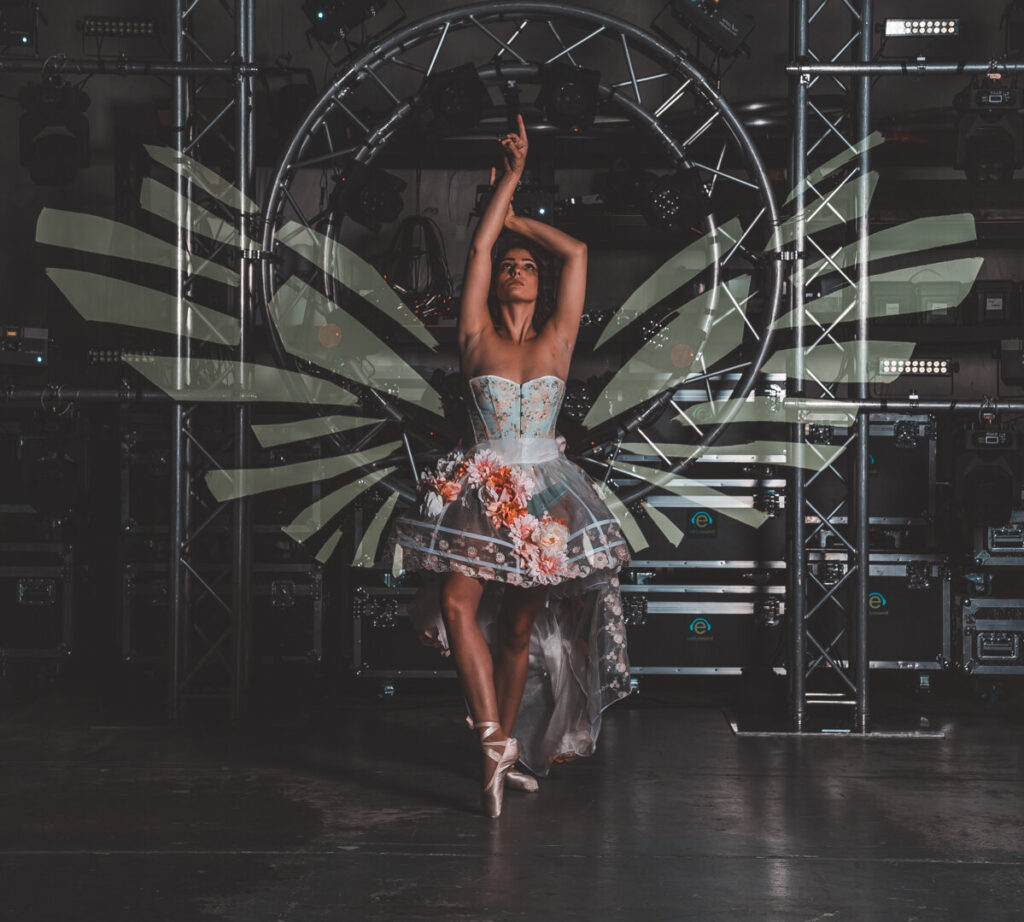
The second use for stencils which Dan Roberts and I came up with similar ideas is a reverse stencil. The idea is you’ll get a ND filter holder and get a clear filter. Then you’ll cut out a black silhouette of whatever you want to hide. Your subject will now frame up with that black silhouette that you’ve pasted onto that filter and you can light paint as much as you want around them or use filters and it won’t affect the clearness of your subject. Then once you are done light painting remove the filter and light your subject.
Video Light Painting
We have a few options with video light painting and I’ll explain them from the free options to paid.
The first option is to use Pablo on the iPhone. You’ll have to find a download of it on the net as it’s no longer available in the app store. While Pablo does work it often crashes and can over exposure somewhat easily. The quality is good but not amazing. However for a free option I’m not complaining as you can get results in real time with no post processing. Here is an example beside. Another option is Light Monster created by Dan Roberts and ask for donations if you use it as it’s free and pretty easy to use. Just follow the instructions on the site. : ]]

Our second option is using Premiere Pro or Kdenlive to add an echo effect or light graffiti effect onto your video in post. I learned the echo technique from Eric Pare and I’ll explain how it works, but it’s important to note that the longer the video the longer the render time. With Kdenlive you don’t have this problem.
In Premiere Pro you’ll put your video on the timeline and set it to where you want the effect to take place. Then grab the echo effect from the effects panel and drop it on your video. I just search for it in the search box. Now in your Timeline you can see the numbers for how many seconds have passed. You are going to right click that and change it to frames. Now make sure your playhead is where you want it to start on your timeline. In the effect controls box you are going to change your operator to maximum. With your playhead in the proper place hit the stopwatch icon in the Number of Echoes then determine where you want the effect to begin, this creates a keyframe. With the end in mind create another keyframe where it ends and then move one frame to the right and create another keyframe. Now get the number of frames between keyframes 1 and 2 and change the number of echoes to that number.
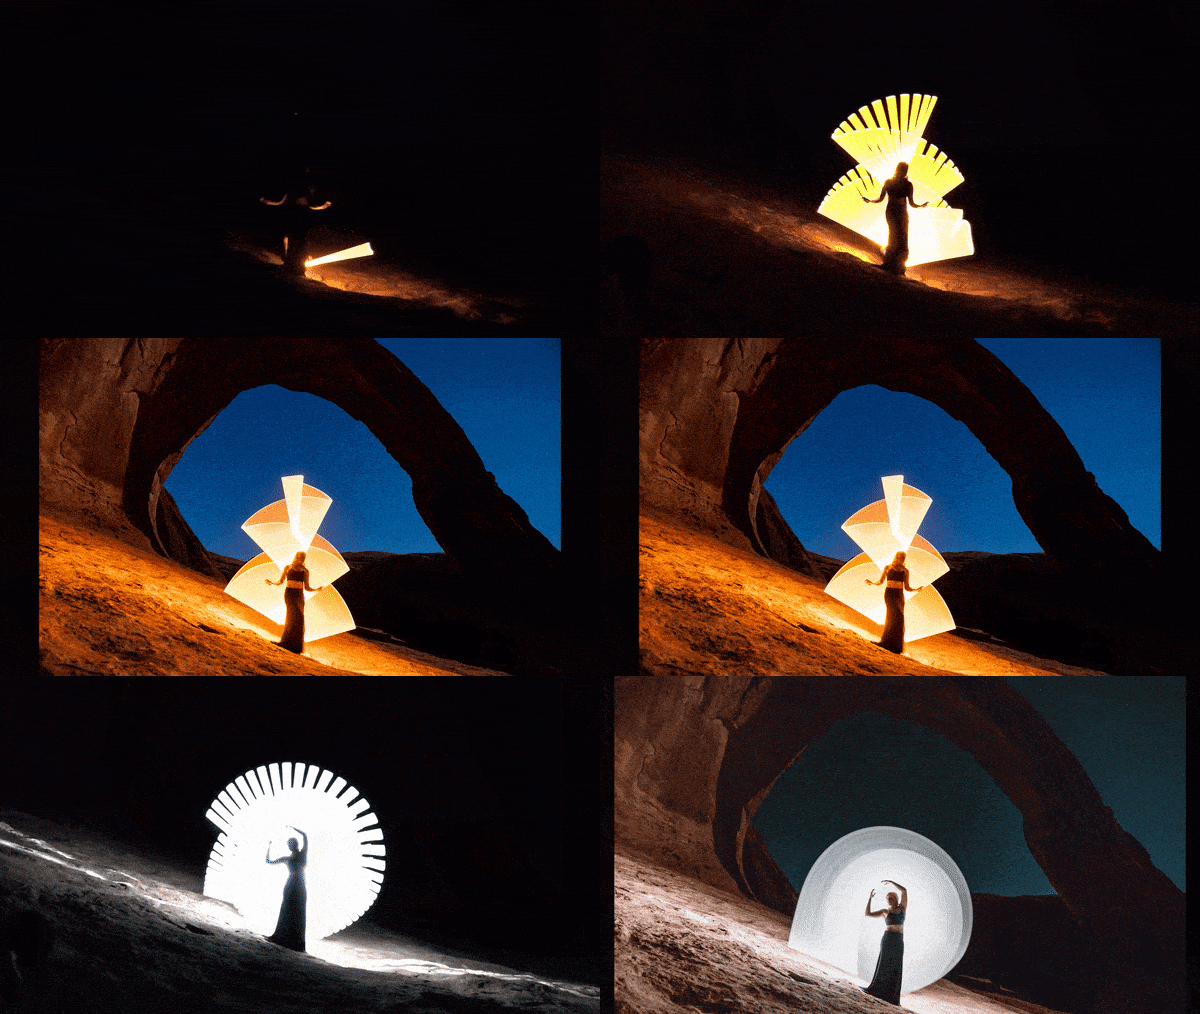
Our last and final solution for video light painting is Virtual Ink. This is a technology developed by Eric Pare that uses two cameras and allows you to capture light painting in ambient light. The reason you have to use two cameras is one for the ambient and one for the light painting and it mixes these two together. You can use it with just one camera and in that instance it will be similar to Pablo but better quality. This is a subscription based service and if you just use it for fun it’s $129.00 for the year and goes up from there for more features.

Focus Pulls
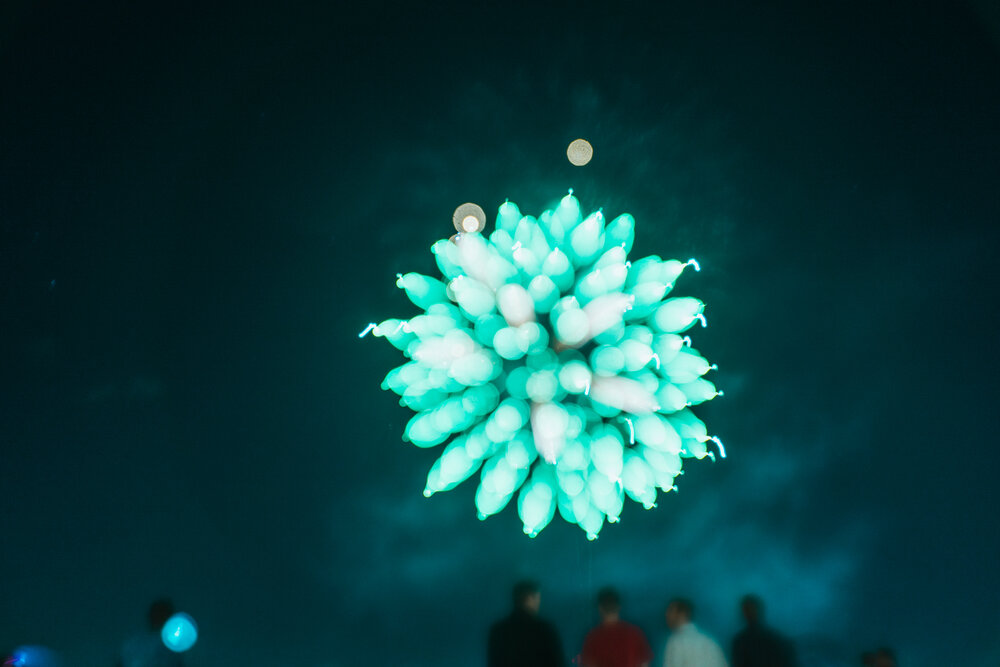
Using these in long exposure can really add a beautiful effect. I mostly do this during fireworks to switch up my photos from everyone else’s. You can do this either handheld or a tripod. Up to you! First you’ll focus on Infinity most likely and you’ll need your f-stop wide open and potentially boost your ISO because we are shooting at night. Then while on Bulb mode with manual focus and a firework is exploding you’ll start your exposure and mess with the focus ring. You’ll get different effects how fast or slow you go so play with it!

Zoom Pulls
Like focus pulls zoom pulls deal with the lens of the camera. As it states in the name you’ll need a zoom lens in order to pull this off. You can do this two different ways. With you camera on a tripod you can start zoomed in and zoom out on your subject or vice versa. You will get different effects depending on which version you do and I’ll show an example of both of those below when I get the images edited.

Stop Motion
If you missed it I explain this process with stop motion drone light painting up above but I’ll include a video on this exact process here.
Kinetic
Kinetic light painting is very similar to shutter drag and shutter drag is really a part of the kinetic family because you are moving the camera to light paint and not the light. There is a great article by Dan Roberts on it here with using a phone.
Bullet Time
As if I haven’t mentioned the person who inspired me to start light painting the most Eric Pare is also someone who uses 176+ cameras in a circle to created 360 bullet time videos. The software alone was expensive to develop not to mention the cameras. Not many people do this and Eric continues to push the possibilities of ideas and disk drive space. You can see it in action here.
